A malfunctioning stator can cause various issues with your dirt bike’s electrical system, such as starting problems, weak battery charge, or flickering lights. Knowing how to test a dirt bike stator is essential to diagnosing and fixing these issues before they escalate. The stator is a crucial part of the dirt bike’s electrical system, and testing it regularly can help keep your bike running smoothly.
In this detailed guide, we will explain how to test a dirt bike stator step by step, providing you with clear instructions and essential tips. Whether you are a novice or an experienced rider, learning to test your stator properly is key to maintaining your bike’s performance.
What is a Dirt Bike Stator?
Before diving into the testing process, let’s understand what a stator does and why it’s important.
Definition of a Stator:
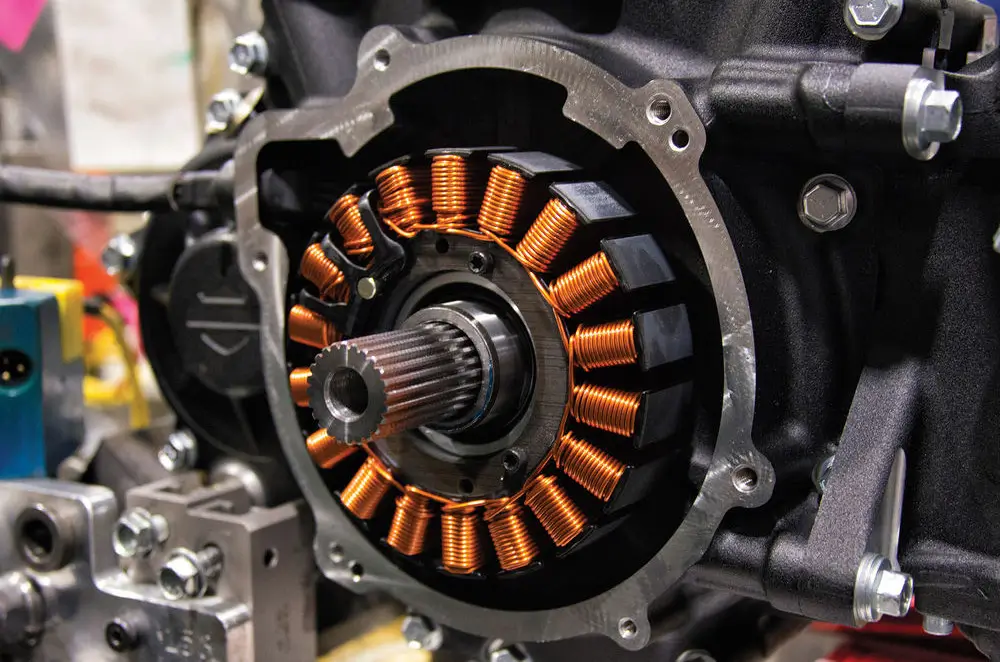
A stator is a vital component in your dirt bike’s electrical system. It generates electrical power by converting mechanical energy from the engine into electrical energy that powers your bike’s ignition, lights, and charging system.
Key Functions of the Stator:
-
Power Generation: The stator generates alternating current (AC) as the engine runs, which is then regulated by the voltage regulator and converted into direct current (DC) for the battery.
-
Ignition: It powers the bike’s ignition system, enabling the engine to start.
-
Battery Charging: The stator helps charge the bike’s battery while the engine is running, ensuring you don’t run into starting problems.
Why It’s Crucial to Know How to Test a Dirt Bike Stator
A malfunctioning stator can cause:
-
Difficulty starting the engine
-
Dim or flickering lights
-
Weak battery
-
Engine misfires
By knowing how to test a dirt bike stator, you can identify electrical issues early and avoid costly repairs. Regular stator testing ensures that your bike remains in good condition for every ride.
Tools Needed to Test a Dirt Bike Stator
Having the right tools is essential when learning how to test a dirt bike stator. Here’s a list of the basic and optional tools you’ll need:
Essential Tools:
-
Multimeter: A digital or analog multimeter is necessary for measuring resistance, voltage, and continuity. This is the primary tool for how to test a dirt bike stator.
-
Screwdrivers: Both flathead and Phillips screwdrivers are required to remove the stator cover and access the stator.
-
Flywheel Puller: This tool is used to safely remove the flywheel, which often covers the stator.
-
Service Manual: The bike’s service manual provides crucial specifications, including resistance values, for accurate stator testing.
Optional Tools:
-
Ohmmeter: This tool can provide more precise resistance measurements than a multimeter.
-
Stator Testing Kit: Some stator testing kits come with all the necessary tools for diagnostics and make testing easier.
-
Magnifying Glass: Use this to inspect small components for damage, wear, or corrosion.
-
Safety Gear: Gloves, safety glasses, and protective footwear will help keep you safe during the testing process.
-
Workbench with Good Lighting: A clean, organized workspace with adequate lighting is important for accurate testing.
By having these tools ready, you’ll be able to efficiently and safely test the stator on your dirt bike.
Safety Precautions for Testing a Dirt Bike Stator
When working with electrical systems, safety is paramount. Here are some safety precautions to follow when learning how to test a dirt bike stator:
Protective Gear:
-
Gloves: Insulated gloves help protect against electrical shocks and sharp edges.
-
Safety Glasses: These protect your eyes from sparks or flying debris during testing.
-
Appropriate Clothing: Long-sleeve shirts and pants protect your skin from electrical components and heat.
-
Sturdy Footwear: Wear boots or closed-toe shoes to protect your feet from dropped tools or bike parts.
Work Environment:
-
Clean Workspace: Ensure the area is free from clutter to avoid accidents.
-
Stable Surface: Make sure your bike is on a stable surface to prevent it from tipping over while you’re working.
-
Disconnect Battery: Always disconnect the bike’s battery before testing to prevent electrical shock or damage.
-
Fire Safety: Keep a fire extinguisher nearby in case of emergencies.
By ensuring a safe work environment and using the right protective gear, you minimize the risk of injury and ensure more accurate results when you test your stator.
Step 1: Pre-Test Inspection of the Stator
Before proceeding with the actual tests, it’s important to perform a quick inspection to identify any obvious issues with the stator.
Visual Inspection:
-
Burnt Wires: Look for any signs of burnt or melted wires, which could indicate overheating or a short circuit.
-
Corrosion: Check for rust or corrosion around the stator or wiring. This can affect the electrical flow and lead to malfunctions.
-
Physical Damage: Examine the stator for any cracks, cuts, or other visible damage that could prevent it from functioning properly.
Check Connections:
-
Loose Wires: Ensure all electrical connections are tight and secure.
-
Corroded Connectors: Clean any dirty or corroded connections with a wire brush to ensure good conductivity.
This initial inspection will help you avoid unnecessary testing if the stator has visible damage or wear that requires replacement.
Step 2: Testing the Stator with a Multimeter
Now that you’ve inspected the stator, it’s time to begin testing. The most common method of how to test a dirt bike stator is to measure the resistance across the stator terminals with a multimeter.
Setting Up the Multimeter:
-
Power Off the Bike: Ensure the bike is completely turned off and the battery is disconnected before starting the test.
-
Set the Multimeter to Resistance (Ω): Switch your multimeter to the resistance setting (Ω), as you’ll be measuring resistance.
-
Check Probe Connections: Make sure the black probe is inserted into the common (COM) port, and the red probe is plugged into the terminal marked with Ω.
Measuring Resistance:
-
Locate the Stator Connector: Find the stator connector and disconnect it from the bike’s wiring harness.
-
Place Probes on Terminals: Insert the multimeter probes into the stator connector terminals, ensuring one probe is on each terminal.
-
Read the Multimeter: The resistance should fall within the range specified in your bike’s service manual. If the resistance is out of range, the stator may be faulty.
-
Test All Terminals: Repeat the test for all the stator terminals, checking each pair to ensure consistent readings.
What to Look for:
-
Normal Resistance: A resistance reading within the specified range means the stator is working properly.
-
High or Low Resistance: Readings that are too high or too low suggest issues such as short circuits or damaged windings.
-
Zero Resistance: If you get a reading of zero ohms, it means there’s a short circuit, indicating a damaged stator.
-
Infinite Resistance: An infinite reading typically signals an open circuit, which means there’s a break in the wiring.
These measurements can give you a clear indication of whether the stator is functioning correctly.
Step 3: Testing the Stator’s AC Voltage
One of the most crucial steps in how to test a dirt bike stator is to test the stator’s AC voltage. The stator needs to produce the correct voltage to power your bike’s ignition system, lights, and charge the battery. If it’s not producing the right amount of power, your bike may experience electrical failures.
Setting Up the Multimeter for AC Voltage:
-
Start the Engine: Turn the bike’s engine on and let it idle. You need the engine running to check the stator’s AC voltage.
-
Set the Multimeter to AC Voltage (V~): Adjust the multimeter to measure AC voltage, indicated by V~ on the dial.
-
Connect the Probes: Attach the black probe to a grounded part of the bike (such as the frame), and the red probe to one of the stator wire connectors.
Measuring AC Voltage:
-
Locate the Stator Wires: The stator wires, coming from the engine, are usually connected to the voltage regulator. Refer to your bike’s service manual to find these wires.
-
Take the Voltage Reading: Start the engine and let it idle. Read the voltage on the multimeter.
-
Compare Voltage: The stator should produce between 20 to 50 volts AC at idle, depending on your bike model. Always check your service manual for the exact voltage range.
Interpreting the Results:
-
Normal Voltage: A reading within the expected range means your stator is working as it should.
-
Low Voltage: If the voltage is lower than expected, this may suggest that the stator is not producing enough power and could need to be replaced.
-
High Voltage: High voltage readings could indicate the stator is overproducing, which could cause damage to other components like the voltage regulator or battery.
Additional Considerations:
If you get an abnormal reading, test each stator wire separately. One faulty wire can indicate a deeper issue with the stator that may need repair or replacement.
Step 4: Advanced Stator Testing Methods
While how to test a dirt bike stator generally involves basic resistance and voltage tests, some issues may not appear through these methods. For a more thorough diagnosis, advanced testing methods like load testing and oscilloscope testing can provide deeper insights into your stator’s condition.
Load Testing:
Load testing simulates the electrical demands placed on your stator during normal riding conditions, revealing how well it performs under load.
-
Connect a Load Tester: Use the service manual to connect a load tester to the stator.
-
Monitor the Voltage: Start the engine and observe the voltage while the bike is under load, simulating riding conditions.
-
Evaluate Results: A healthy stator should maintain consistent voltage under load. If the voltage fluctuates or drops, the stator may be starting to fail and need replacement.
Oscilloscope Testing:
Oscilloscope testing provides a visual representation of the stator’s electrical output, making it easier to spot irregularities that aren’t visible through basic testing.
-
Connect the Oscilloscope: Attach the oscilloscope probes to the stator’s output wires.
-
Observe the Waveform: The oscilloscope will display the waveform produced by the stator.
-
Evaluate the Waveform: A smooth and consistent waveform indicates a healthy stator. Any irregularities in the waveform signal an issue with the stator, such as damaged coils.
When to Use Advanced Testing:
-
Persistent Electrical Problems: If your bike continues to experience electrical failures despite passing basic tests, advanced methods like load testing or oscilloscope testing may uncover issues that are otherwise hard to detect.
-
Professional Diagnosis: These methods are often used by mechanics and professionals to thoroughly diagnose stator problems, especially when standard tests fail to provide clear answers.
Step 5: Interpreting the Test Results
Once you’ve performed the tests to learn how to test a dirt bike stator, interpreting the results correctly is critical to determining whether the stator is functioning properly.
Normal Test Results:
-
Resistance: A resistance reading between 0.1 and 1.0 ohms suggests the stator is healthy and functioning as expected.
-
AC Voltage: Voltage between 20 to 50 volts AC at idle typically indicates a working stator.
-
Oscilloscope Waveform: A consistent and smooth waveform shows that the stator is generating steady power.
Abnormal Test Results:
-
High or Low Resistance: If the resistance is too high or low, the stator may be damaged or have a short or open circuit.
-
Low or No Voltage: Low or no voltage suggests that the stator isn’t generating enough power and may need replacement.
-
Irregular Waveform: An irregular waveform indicates potential damage or malfunction inside the stator, which may require a new stator.
Step 6: Maintaining Your Dirt Bike Stator
After learning how to test a dirt bike stator, maintaining it properly can help extend its lifespan and prevent future issues. Here’s how you can care for your stator:
Regular Cleaning:
Dirt and grime can accumulate on the stator and hinder its performance. Cleaning it regularly helps prevent electrical issues from developing.
-
Remove the Stator Cover: Carefully remove the stator cover to expose the stator.
-
Clean the Stator: Use a soft brush to clean off dirt and grime. Be gentle to avoid damaging the stator components.
-
Inspect for Damage: While cleaning, check for visible cracks, corrosion, or wear that could affect the stator’s functionality.
Proper Storage:
When storing your dirt bike for long periods, it’s important to protect the stator from moisture and corrosion.
-
Store in a Dry Place: Keep the bike in a dry location to prevent rust and damage to the stator.
-
Use a Bike Cover: A cover will protect your stator from dust, dirt, and moisture while the bike is not in use.
Regular Inspections:
Testing the stator periodically as part of your regular maintenance will help you catch issues before they become major problems. Regular testing ensures that the stator is always functioning properly.
Conclusion


