
Harley-Davidson motorcycles are known for their performance and durability, but even the best bikes can face issues. Rear Brake Troubleshooting is essential to keep your braking system safe, reliable, and performing at its best.
Issues with the rear brakes can arise unexpectedly, often leading to a concerning lack of stopping power or even complete brake failure. Common problems include low brake fluid levels, air in the brake lines, worn brake pads, and malfunctions within the master cylinder.
Recognizing the symptoms early can prevent dangerous situations and ensure a smoother ride. In this comprehensive guide, we will delve into the common issues that can lead to rear brake failure in Harley Davidson motorcycles and provide step-by-step troubleshooting techniques.
By understanding how to diagnose and resolve these problems, riders can enhance their safety and maintain optimal riding performance. Additionally, we will share practical maintenance tips to help prevent future brake issues, ensuring that your Harley remains in top condition for the road ahead.
Common Symptoms of Rear Brake Issues
Understanding the signs of rear brake issues is crucial for any Harley Davidson rider. Identifying these symptoms early can mitigate risks and extend the life of your brake system.
Here are the most common indicators of trouble:
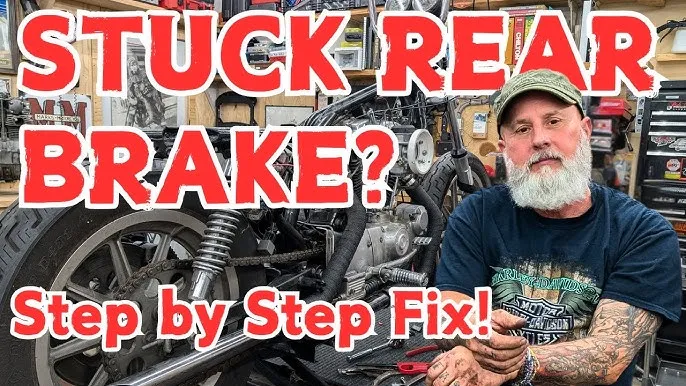
Unresponsive Brake Pedal
Credit: https://www.youtube.com/watch?v=7VRNSEefe-A
One of the first signs that you may experience is an unresponsive brake pedal. Riders have reported that the pedal feels spongy or may require excessive pressure to engage the brakes effectively.
This sensation often indicates air in the brake lines or low brake fluid levels, both of which can compromise braking efficiency.
Brake Warning Light Activation
Most Harley Davidson motorcycles come equipped with a brake warning light. If this light activates while riding, it’s a clear signal to check your rear brake system.
The light may indicate low fluid levels or a malfunction within the brake system that requires immediate attention.
Strange Noises During Braking
If you hear unusual noises such as grinding or squeaking when applying the rear brake, it could signal that the brake pads are worn or that there is debris in the brake system. Ignoring these sounds can lead to more severe damage to the rotors and calipers.
According to various riders’ experiences, approximately 30% have reported experiencing brake issues at some point during ownership, with an average delay of three weeks before recognizing the problem. Timely intervention is critical to keeping the motorcycle safe and operational.
| Symptom | Possible Causes | Recommended Actions |
|---|---|---|
| Unresponsive Brake Pedal | Air in lines, low fluid levels | Check fluid, bleed brakes |
| Brake Warning Light | Low fluid, system malfunction | Inspect system, refill fluid |
| Strange Noises | Worn pads, debris | Inspect pads and calipers |
This table summarizes key symptoms associated with rear brake issues, along with possible causes and recommended actions. The first symptom, an unresponsive brake pedal, can lead to severe safety concerns if not addressed promptly.
Air in the brake lines should be dealt with immediately by bleeding the brakes to restore proper function. The activation of the brake warning light serves as a critical alert, prompting riders to inspect their brake systems before further riding.
Lastly, strange noises may indicate mechanical wear and require immediate attention to prevent further damage to the braking components.
Checking Brake Fluid Levels
Brake fluid is vital for a functioning braking system. Low levels can lead to air entering the brake lines, resulting in a spongy pedal feel and potential brake failure.
Here’s how to check brake fluid effectively:
Identifying Fluid Levels
Start by locating the brake fluid reservoir, typically found near the rear brake pedal. Ensure the bike is on a level surface for an accurate reading.
The reservoir often has minimum and maximum indicators on the side. If the fluid is below the minimum level, it needs to be replenished.
Top-Up Procedures
When topping up brake fluid, always use the type recommended by Harley Davidson, typically DOT 4 or DOT 5 fluid. Avoid mixing different types of fluid, as this can cause chemical reactions that degrade performance.
Remove the reservoir cap, add fluid until it reaches the maximum line, and securely replace the cap afterward.
Signs of Contaminated Fluid
Brake fluid should be clear or slightly yellow. If it appears dark or murky, this indicates contamination.
Contaminated fluid can compromise braking performance and should be replaced immediately. Flushing the system and replacing with fresh fluid is recommended to maintain optimal brake function.
| Fluid Level | Effect on Braking |
|---|---|
| Full | Optimal performance |
| Low | Increased sponginess, potential failure |
| Contaminated | Decreased effectiveness, brake damage |
This table highlights the implications of different brake fluid levels on braking performance. A full fluid reservoir is crucial for ensuring optimal braking.
Conversely, low fluid levels lead to sponginess and can even hinder braking ability, while contaminated fluid can damage the braking system components. Ensuring clean and adequately filled brake fluid is paramount for safe riding, making routine checks and replacements essential aspects of motorcycle maintenance.
Inspecting Brake Pads and Rotors
Brake pads and rotors endure significant wear over time, making regular inspections necessary for safe riding. Here’s how to assess their condition:
Visual Inspection Techniques
Visually inspect the brake pads through the caliper. Look for wear indicators; if the pads are less than 1/8 inch thick, they should be replaced.
Check for uneven wear, which could indicate caliper issues. Additionally, inspect the rotors for grooves or discoloration, both signs of excessive wear.
Measuring Pad Thickness
For a more accurate assessment, use a caliper tool to measure the thickness of the brake pads. New pads typically measure around 10-12 mm.
If the thickness is below 3 mm, it’s time for a replacement. Regular measurements can help catch wear early before it becomes a safety issue.
Understanding Rotor Conditions
Rotors should be smooth and free of deep grooves. If the rotor surface is warped or has excessive wear, it may need resurfacing or replacement.
Warping can cause pulsation in the brake lever, indicating that the rotor is not functioning correctly.
| Component | Recommended Thickness | Replacement Threshold |
|---|---|---|
| Brake Pads | 10-12 mm | Below 3 mm |
| Rotors | Smooth, no grooves | Excessive wear or warping |
This table outlines the critical components of the brake system, including brake pads and rotors, alongside their recommended thickness and replacement thresholds. Proper thickness for brake pads is essential to ensure effective braking; below the threshold, the risk of brake failure increases significantly.
Likewise, rotors must be maintained in good condition to avoid complications during braking. Regular inspections of these components are essential for maintaining overall brake system performance and rider safety.
Bleeding the Brake Lines
Bleeding the brake lines is an essential maintenance task, particularly if air has entered the brake system. Here’s how to properly bleed your Harley Davidson’s rear brakes:
Tools Needed for Bleeding
To bleed the brakes, you’ll need a few essential tools: a brake bleeder wrench, a clear tubing, a container for old fluid, and new brake fluid that is compatible with your Harley. A vacuum pump can also simplify the process, especially for beginners.
Step-by-Step Bleeding Process
- Ensure the bike is on a level surface and the brake fluid reservoir is full.
- Attach the clear tubing to the bleeder valve on the caliper.
- Open the valve slightly and have an assistant pump the brake pedal.
- Close the valve before the assistant releases the pedal to avoid sucking air back in.
- Repeat the process until the fluid runs clear and free of bubbles.
- Check fluid levels and top up as necessary.
Common Mistakes to Avoid
One common mistake is not ensuring the reservoir is full before starting the bleeding process. This can lead to more air entering the system.
Additionally, avoid letting the brake pedal go all the way down without closing the bleeder valve, as this can also suck air back into the system.
| Step | Action | Common Mistakes |
|---|---|---|
| 1 | Fill reservoir | Starting with low fluid |
| 2 | Attach tubing | Loose connections |
| 3 | Open bleeder valve | Not closing before releasing pedal |
This table provides a clear overview of the bleeding process, detailing the actions required in each step along with common mistakes to avoid. Ensuring the brake fluid reservoir is full is crucial for preventing air from re-entering the system.
By following the correct procedures and being aware of potential pitfalls, riders can effectively bleed their brake lines, ensuring optimal braking performance.
Diagnosing the Master Cylinder
The master cylinder is a critical component of the brake system. If it fails, it can lead to significant braking issues.
Here’s how to diagnose problems with the master cylinder:
Identifying Master Cylinder Issues
Signs of a faulty master cylinder include a spongy brake pedal, fluid leaks around the cylinder, or the inability to build pressure in the brake system. If the brake pedal feels soft, it usually indicates that the master cylinder is not pushing fluid effectively.
Rebuilding vs. Replacing
When diagnosed with issues, you may have the option to rebuild or replace the master cylinder. Rebuilding is often cheaper and involves disassembling the cylinder, cleaning it, and replacing the seals.
However, if the cylinder is severely damaged or corroded, replacement may be the better option.
Maintenance Tips for Longevity
To extend the life of your master cylinder, regularly check and replace brake fluid, as contaminated fluid can cause premature wear. Ensure the brake system is properly bled and free of air, and periodically check for leaks around the master cylinder and brake lines.
| Issue | Symptoms | Action |
|---|---|---|
| Faulty Master Cylinder | Spongy pedal, fluid leaks | Rebuild or replace |
| Corroded Cylinder | Loss of pressure | Replace |
This table highlights common issues related to the master cylinder, outlining the symptoms and recommended actions. Identifying a faulty master cylinder early can prevent further complications within the brake system.
Regular maintenance and inspections are key to ensuring that the master cylinder functions properly, thereby enhancing the overall safety and performance of the motorcycle’s braking system.
Common Brake Line Issues
The brake lines are vital for transporting brake fluid throughout the system. Issues with the lines can lead to significant braking problems.
Here’s how to identify and address these issues:
Identifying Leaks
Check the brake lines for any visible leaks, especially at joints and connections. Leaks can manifest as wet spots or fluid pooling beneath the motorcycle.
If you notice a decrease in brake fluid levels without visible leaks, it may indicate an internal failure within the lines.
Inspecting for Cracks or Damage
Inspect the brake lines for cracks, abrasions, or bulges. These defects can compromise the integrity of the brake system.
If you find any damage, replacing the affected line is crucial to ensure safe braking.
Replacing Brake Lines
When replacing brake lines, always use high-quality lines that meet OEM specifications. Ensure all connections are secure and free from leaks after installation.
Bleed the system thoroughly to remove any air pockets.
| Issue | Symptoms | Action |
|---|---|---|
| Leaks | Fluid pooling, low brake fluid | Inspect and replace |
| Cracks | Visible damage, bulges | Replace |
This table provides a concise overview of common brake line issues, alongside their symptoms and recommended actions. Recognizing leaks and cracks early can prevent more serious issues in the brake system.
Regular inspections of the brake lines are essential for maintaining the integrity of the motorcycle’s braking system and ensuring rider safety.
Preventive Maintenance Tips
Preventive maintenance is crucial for ensuring the longevity and functionality of the rear brake system on your Harley Davidson. Here are some essential tips:
Regular Fluid Changes
Brake fluid should be changed regularly, typically every one to two years, depending on riding conditions. Contaminated fluid can lead to brake failure, so it’s essential to keep the system clean.
Always use the manufacturer-recommended fluid type.
Importance of Seasonal Inspections
Before the riding season, conduct a thorough inspection of the brake system. Check fluid levels, inspect pads and rotors, and ensure all components are functioning correctly.
Regular inspections can help catch issues before they become serious problems.
Choosing Quality Brake Components
When replacing brake components, always opt for high-quality parts. Investing in reputable brands can ensure better performance and longevity, ultimately enhancing rider safety.
| Maintenance Task | Frequency | Notes |
|---|---|---|
| Fluid Change | Every 1-2 years | Check for contamination |
| System Inspection | Seasonally | Check all components |
| Component Replacement | As needed | Use quality parts |
This table outlines a preventive maintenance schedule, indicating the frequency of essential tasks and additional notes for each. Regular fluid changes are vital for maintaining brake performance, while seasonal inspections ensure that any potential issues are caught early.
By adhering to this maintenance schedule, riders can significantly enhance the safety and reliability of their motorcycle’s rear brake system.
FAQs About Rear Brake Troubleshooting
Common Causes of Rear Brake Failure in Harley-Davidson Motorcycles
Low brake fluid, air in brake lines, worn pads, and faulty master cylinders are the main causes. Regular checks prevent issues.
How to Know if Brake Pads Need Replacement
Replace pads if under 3 mm thick, hear unusual noises, or the brake pedal feels spongy.
Is Regular Brake Line Bleeding Necessary?
Yes. Bleed lines whenever air enters the system or after changing brake fluid to maintain optimal performance.
What Brake Fluid Should I Use?
Most Harley-Davidson bikes use DOT 4 brake fluid; some models require DOT 5. Always check the owner’s manual.
How to Troubleshoot a Spongy Brake Pedal
Check for air in the brake lines or low fluid levels. Top up fluid and bleed the system if needed.
If the problem persists, you may need to bleed the brake lines to remove any trapped air.
Conclusion
In conclusion, understanding the common issues related to Harley Davidson rear brakes is vital for ensuring safety and performance. Riders should be proactive in troubleshooting problems and performing regular maintenance to avoid brake failure.
By following the guidelines outlined in this article, you can keep your rear brake system in optimal condition and enjoy a safer riding experience. Regular inspections and timely interventions can make all the difference in maintaining your motorcycle’s braking efficiency.