How to fix a bike pedal, remove the damaged pedal with a wrench, then install a new one by screwing it in. Ensure it is tightened securely to effectively fix a bike pedal.
Fixing a bike pedal is a straightforward task that most cyclists can handle with ease. Properly functioning pedals are crucial for a smooth and efficient ride. Over time, pedals can wear out or become damaged, making it necessary to replace or repair them.
A few basic tools and some simple steps are all you need to get your bike back in top condition. This guide will help you quickly and easily replace a faulty pedal, ensuring your bike is safe and ready for your next adventure. Whether you are a seasoned cyclist or a beginner, maintaining your bike pedals is essential for optimal performance.
Credit: www.bikeupkeep.com
Tools You Need
Fixing a bike pedal is a simple task. But you need the right tools. Below, you’ll find a list of essential and optional tools to make the job easier.
Essential Tools
You need a few key tools to fix a bike pedal. These tools are crucial for a smooth repair process.
- Pedal Wrench: A special wrench made for bike pedals. It fits the narrow space between the pedal and crank arm.
- Hex Key Set: Also known as Allen wrenches. These are used for pedals with hex bolts.
- Grease: Keeps the threads smooth and prevents rust.
- Rags: Clean any dirt or old grease before applying new grease.
Optional Tools
These tools are not essential but can make the job easier. They can also help if you have a stubborn pedal.
- Rubber Mallet: Useful for tapping out stuck pedals without damaging them.
- Torque Wrench: Ensures you tighten the pedal to the correct torque.
- Thread Locker: Keeps the pedal from loosening over time.
- Bike Stand: Holds the bike steady, making your work easier.

Credit: www.youtube.com
Preparing Your Bike
Before fixing your bike pedal, you need to prepare your bike. Preparation ensures a smooth and safe process. This step is crucial for a successful repair.
Safety Precautions
- Wear gloves to protect your hands.
- Make sure to wear eye protection.
- Keep your workspace clean and organized.
- Ensure your tools are easily accessible.
Positioning The Bike
Position your bike in a stable manner. This is essential for an easy fix.
- Use a bike stand if available.
- If no stand, flip the bike upside down.
- Ensure the bike is on a flat surface.
- Check that the bike is secure and won’t move.
| Step | Description |
|---|---|
| 1 | Wear gloves and eye protection. |
| 2 | Organize your tools. |
| 3 | Use a bike stand or flip the bike. |
| 4 | Ensure stability and safety. |
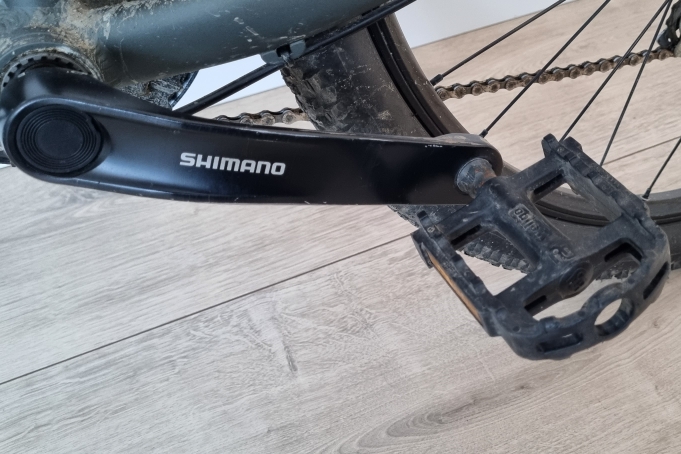
Removing The Old Pedal
Removing the old pedal from your bike is crucial. This step ensures a smooth installation of the new pedal. Follow these instructions to remove the old pedal without hassle.
Loosening The Pedal
First, identify the pedal you want to remove. Use a pedal wrench or a 15mm spanner. Position the wrench on the flat part of the pedal axle.
Turn the wrench counterclockwise to loosen the right pedal. For the left pedal, turn the wrench clockwise. This is because the left pedal has reverse threads.
If the pedal is tight, apply more force. You can also use some lubricant to ease the process.
Detaching The Pedal
Once the pedal is loose, continue turning the wrench. This will help to unscrew the pedal completely.
After a few turns, you can use your hand to detach the pedal. Hold the pedal firmly and pull it away from the crank arm.
If the pedal is stuck, use a rubber mallet. Gently tap the pedal to loosen it further.
Ensure that you remove any dirt or rust from the crank arm threads. This will make the installation of the new pedal easier.
| Step | Action |
|---|---|
| 1 | Identify the pedal to remove |
| 2 | Use a pedal wrench or 15mm spanner |
| 3 | Turn counterclockwise for the right pedal |
| 4 | Turn clockwise for the left pedal |
| 5 | Unscrew the pedal completely |
| 6 | Detach the pedal by hand |
| 7 | Clean the crank arm threads |
Inspecting The Crank Arm

Inspecting the crank arm is a crucial step in fixing a bike pedal. This component connects the pedal to the bike and ensures smooth rotation. Any damage or dirt can affect your ride. Follow these steps to check and clean the crank arm.
Checking For Damage
First, look closely at the crank arm for any visible damage. Cracks, bends, or wear can weaken the crank arm.
- Cracks: Examine the entire length for any splits or fractures.
- Bends: Ensure the crank arm is straight and not bent.
- Wear: Check the surface for any signs of excessive wear.
If you find any damage, consider replacing the crank arm. Riding with a damaged crank arm can be unsafe.
Cleaning The Threads
Next, clean the threads where the pedal attaches to the crank arm. Dirt and debris can cause the pedal to loosen.
- Remove the pedal: Use a pedal wrench to take off the pedal.
- Clean the threads: Use a brush to remove any dirt and old grease.
- Apply fresh grease: Add a small amount of grease to the threads.
- Reattach the pedal: Screw the pedal back into place securely.
Cleaning the threads regularly ensures a secure connection between the pedal and crank arm.
| Step | Description |
|---|---|
| Check for cracks | Look for splits along the crank arm. |
| Check for bends | Ensure the crank arm is straight. |
| Check for wear | Inspect the surface for wear. |
| Clean threads | Brush off dirt and old grease. |
| Grease threads | Add fresh grease to the threads. |
These steps will help keep your bike in top shape. A well-maintained crank arm ensures a smooth and safe ride. Remember, regular inspections can prevent major issues down the road.
Installing The New Pedal
Replacing a bike pedal can seem tricky, but it’s simple with the right steps. Installing the new pedal involves careful alignment and proper tightening. Follow this guide to get back on the road quickly.
Aligning The Pedal
Start by aligning the new pedal with the crank arm. Remember, the left pedal has reverse threads.
- Identify the left and right pedals.
- Match the threads to the correct side.
- Hand-screw the pedal into the crank arm.
Hand-screwing reduces the risk of cross-threading. Ensure the pedal threads in smoothly. If it resists, stop and realign.
Tightening The Pedal
Once the pedal is properly aligned, use a pedal wrench to tighten it. Follow these steps:
- Place the pedal wrench on the flats of the pedal axle.
- Turn the wrench clockwise for the right pedal.
- Turn the wrench counterclockwise for the left pedal.
- Tighten until the pedal is secure and firm.
Avoid over-tightening. Over-tightening can damage the threads and the crank arm. The pedal should be firm but not excessively tight.
With these steps, your new pedal is installed and ready. Enjoy your ride!
Ensuring Proper Fit
Fixing a bike pedal is not complete without ensuring it fits right. A loose pedal can be dangerous and cause accidents. By making sure the pedal is fitted properly, you ensure a smooth and safe ride.
Testing The Pedal
Before adjusting, test the pedal. Spin the pedal with your hand. It should turn smoothly without any wobbling. Check if the pedal feels firm and secure.
If it wobbles, it may need tightening or replacement. Also, see if the threads on the pedal and crank arm are clean. Dirt and grime can affect the fit.
Adjusting If Needed
If the pedal is not fitting right, adjust it. Use a pedal wrench to tighten or loosen the pedal. Turn the wrench clockwise to tighten and counterclockwise to loosen.
- Ensure you are turning the right way, as left and right pedals have different threads.
- Check the tightness regularly to maintain a proper fit.
Also, inspect the crank arm. If it is damaged, it may need repair or replacement. Always ensure both the pedal and crank arm are in good condition.
Final Checks
Once you’ve installed your new bike pedal, it’s crucial to conduct final checks. These checks ensure everything is secure and functioning well. They can help prevent accidents and ensure a smooth ride.
Inspecting The Installation
First, visually inspect the pedal installation. Make sure the pedals are securely fastened to the crank arms. Use a wrench to confirm they are tight. Loose pedals can cause accidents.
Check the alignment of the pedals. They should be parallel to the ground. Misaligned pedals can lead to discomfort and inefficient pedaling.
| Step | Action |
|---|---|
| 1 | Visually inspect the pedals |
| 2 | Check for tightness with a wrench |
| 3 | Ensure pedals are parallel to the ground |
Taking A Test Ride
Now, take your bike for a short test ride. This will help you identify any issues that might not be visible.
- Start by riding at a slow speed.
- Listen for any unusual noises.
- Feel for any unusual vibrations.
- Ensure the bike pedals smoothly.
If everything feels good, gradually increase your speed. Pay attention to how the pedals feel under your feet. They should feel sturdy and stable.
If you notice any issues, stop immediately. Re-inspect the pedals and adjust as needed. Safety is the top priority.
Maintenance Tips
Keeping your bike pedals in top shape ensures a smooth ride. Regular maintenance can extend the life of your bike and improve performance. Here are some essential tips for maintaining your bike pedals.
Regular Checks
Perform regular checks on your bike pedals to spot any issues early. Inspect the pedals for wear and tear. Check for cracks or loose components. Make sure the pedals are securely attached to the crank arms.
- Check for any unusual noise or movement.
- Ensure the pedal threads are not stripped.
- Inspect for rust or corrosion.
Lubrication Tips
Proper lubrication keeps your pedals spinning smoothly. Use a high-quality bike-specific lubricant. Apply the lubricant to the pedal bearings and threads.
- Clean the pedals with a rag.
- Apply a few drops of lubricant to the bearings.
- Wipe off any excess lubricant.
Repeat this process every few months or as needed.
Credit: www.instructables.com
Frequently Asked Questions
How Do I Know If My Bike Pedal Is Loose?
If your bike pedal wobbles or makes noise, it’s likely loose. Check for any visible gaps or movement.
What Tools Do I Need To Fix A Bike Pedal?
You’ll need a pedal wrench or an Allen key. A grease or lubricant is also recommended for smooth installation.
How Often Should I Check My Bike Pedals?
Check your bike pedals every few months. Regular maintenance ensures they remain secure and functional.
Can I Ride With A Damaged Bike Pedal?
Riding with a damaged bike pedal is unsafe. It can cause accidents or further damage to your bike.
Conclusion
How to Fix a Bike Pedal can seem challenging, but it’s manageable with the right steps. Regular maintenance is key. Ensure your tools are handy and follow the guide carefully. A well-maintained pedal enhances your biking experience. Keep practicing these steps, and soon, fixing pedals will become second nature.
Happy biking!


