
A broken bike pedal can make riding difficult and unsafe. Fixing it promptly is crucial for a smooth ride.
Pedals are essential components of a bicycle, directly affecting performance and safety. A broken pedal can lead to inefficient pedaling and potential accidents. Repairing or replacing the pedal ensures a comfortable and secure biking experience. Whether you’re an avid cyclist or a casual rider, understanding how to address a broken pedal is vital.
This guide will walk you through the necessary steps to fix or replace a broken bike pedal. By following these tips, you can maintain your bike’s functionality and enjoy a safe ride. Regular maintenance can also prevent such issues from recurring, keeping your bike in top condition.
Common Causes
Bike pedals can break for many reasons. Knowing the common causes helps prevent future issues. This section will explore the most frequent reasons for broken bike pedals.
Wear And Tear
Bike pedals endure a lot of stress. Over time, they wear out. Daily use weakens the pedals. Pedals can crack or become loose. Regular maintenance can help, but all pedals will wear down eventually.
Accidental Damage
Accidents happen. A bike may fall over or hit something hard. This can break the pedals. Even a small crash can cause significant damage. Always check pedals after an accident.
| Common Causes | Description |
|---|---|
| Wear and Tear | Daily use weakens pedals over time. |
| Accidental Damage | Falls or crashes can break pedals. |
- Regular Maintenance: Inspect pedals frequently.
- Immediate Action: Fix or replace damaged pedals promptly.
Tools Needed
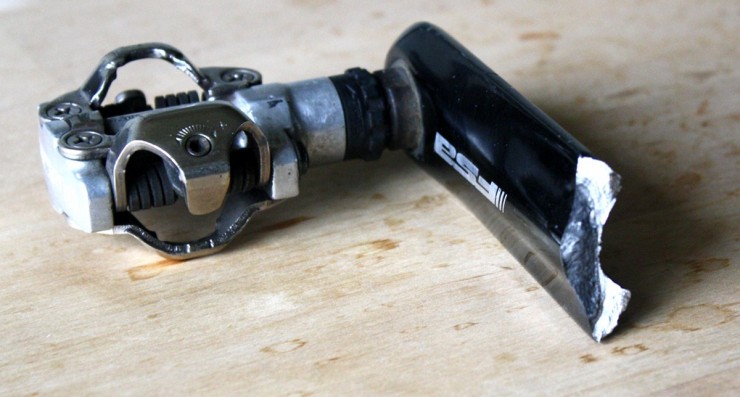
Credit: www.dracotorre.com
Fixing a broken bike pedal can be a simple task. But you need the right tools. This section will guide you through the necessary tools. Let’s explore the basic and advanced tools required for this job.
Basic Tools
Even simple tools can help you fix a bike pedal. Here’s a list of basic tools you might need:
- Wrench – A 15mm wrench is usually enough.
- Allen Key – Commonly used for bike pedals.
- Lubricant – Helps loosen tight bolts.
A wrench and Allen key are often enough. Keep some lubricant handy to ease your work.
Advanced Tools
Sometimes, basic tools aren’t enough. Here are some advanced tools you might need:
- Pedal Wrench – Specially designed for bike pedals.
- Torque Wrench – Ensures the right tightness.
- Thread Locker – Keeps the pedal screws in place.
A pedal wrench fits better than a regular wrench. A torque wrench helps you avoid over-tightening. Use a thread locker for extra security.
Temporary Fixes
A broken bike pedal can ruin your ride. Knowing some temporary fixes can save the day. These quick solutions will help you continue your journey safely. Here are two effective methods: using tape and using zip ties.
Using Tape
Tape can be a quick fix for a broken pedal. You’ll need strong, durable tape. Follow these steps:
- Clean the pedal area to remove any dirt.
- Wrap the tape around the broken part tightly.
- Ensure the tape covers all cracks and broken pieces.
- Test the pedal to ensure it feels secure.
Using tape can provide a temporary solution. It helps keep the pedal in place until you can get a proper repair.
Using Zip Ties
Zip ties are another great option for a temporary pedal fix. They are strong and easy to use. Here’s how you can use zip ties:
- Grab a few strong zip ties.
- Place the broken pieces of the pedal together.
- Wrap the zip ties around the broken parts.
- Tighten the zip ties as much as possible.
- Trim any excess length of the zip ties.
Zip ties will hold the pedal together for a short time. This method helps you ride safely until you find a more permanent solution.
| Method | Materials Needed | Steps |
|---|---|---|
| Using Tape | Strong, durable tape |
|
| Using Zip Ties | Strong zip ties |
|
Both methods are effective for a quick, temporary fix. They ensure you can continue riding your bike safely.
Permanent Solutions
Are you tired of dealing with a broken bike pedal? It’s time to find permanent solutions. Here, we will discuss two effective methods: replacing pedals and repairing threads. These solutions will ensure your bike is back in top shape.
Replacing Pedals
Replacing a broken bike pedal is a straightforward task. Follow these steps to get the job done:
- Remove the old pedal: Use a wrench to unscrew the broken pedal. Turn counterclockwise to remove it.
- Prepare the new pedal: Ensure the new pedal matches the thread size of your bike.
- Install the new pedal: Screw the new pedal into the crank arm. Turn clockwise to tighten.
- Check the alignment: Ensure the pedal is securely fitted and aligned.
Replacing the pedal ensures a smooth and safe ride. It’s a permanent fix that takes minimal effort.
Repairing Threads
If the pedal thread is damaged, repairing it is essential. Follow these steps:
- Assess the damage: Check the pedal threads for any wear or stripping.
- Use a thread repair kit: These kits come with all necessary tools.
- Clean the threads: Remove any debris or dirt from the threads.
- Insert the repair tool: Carefully thread the repair tool into the damaged area.
- Install a thread insert: Screw in the thread insert for a secure hold.
- Reattach the pedal: Fit the pedal back onto the repaired threads.
Repairing threads extends the life of your bike’s crank arm. It also ensures a secure fit for your new pedal.
Both solutions are effective and long-lasting. Choose the method that best suits your bike’s condition. Happy riding!
Preventive Maintenance
Keeping your bike pedals in top condition is essential. Regular preventive maintenance can save you from unexpected breakdowns. This section will guide you through simple steps to ensure your bike pedals stay functional.
Regular Inspections
Inspect your bike pedals at least once a month. Look for any visible cracks or wear. Check if the pedal axles are bent. Ensure the pedals spin smoothly without any resistance. If you notice any damage, consider replacing the pedals immediately.
Proper Lubrication
Lubricating your bike pedals ensures they rotate smoothly. Apply a few drops of bike-specific lubricant to the pedal threads. Spin the pedals to distribute the lubricant evenly. Wipe off any excess lubricant to avoid dirt accumulation.
Regular lubrication prevents rust and extends the life of your pedals. Lubricate your bike pedals every few months, or after riding in wet conditions.
Credit: www.reddit.com
Choosing The Right Pedals
Choosing the right pedals for your bike is vital. The right pedals can enhance your riding experience. They ensure safety and comfort. Let’s explore different options available.
Material Types
Pedals come in various materials. Each type offers unique benefits:
| Material | Pros | Cons |
|---|---|---|
| Plastic | Lightweight, Affordable | Less Durable |
| Aluminum | Durable, Lightweight | Can Be Expensive |
| Steel | Very Durable | Heavy |
Pedal Designs
Pedal designs vary based on riding style:
- Flat Pedals: Good for beginners. They offer a large surface area.
- Clipless Pedals: Secure your feet to the pedals. Ideal for advanced riders.
- Combination Pedals: Offer both flat and clipless options. Versatile for different terrains.
Choosing the right pedals can enhance your biking experience. Consider the material and design. This ensures you pick the best pedal for your needs.
Safety Tips
Riding a bike with a broken pedal can be dangerous. It’s essential to know how to stay safe. Follow these safety tips to avoid accidents and injuries.
Riding Techniques
Adopt safe riding techniques to maintain balance. Use the working pedal more. Keep your weight centered to avoid tipping over.
Pedal smoothly with the working pedal. Avoid sudden movements that can make you fall. Keep your pace slow to stay in control.
Emergency Preparedness
Always be prepared for emergencies. Carry essential tools and supplies. A small toolkit and a spare pedal can be lifesavers.
Include these items in your emergency kit:
- Multi-tool
- Spare pedal
- Allen keys
- First-aid kit
Know how to use each tool. Practice replacing pedals at home. This will prepare you for real situations.
| Tool | Purpose |
|---|---|
| Multi-tool | General repairs |
| Spare pedal | Replace broken pedal |
| Allen keys | Tighten screws |
| First-aid kit | Treat minor injuries |

Credit: www.instructables.com
When To Seek Professional Help
Fixing a broken bike pedal can be tricky. Knowing when to seek professional help is crucial. Sometimes, the repair is too complex. Other times, you may lack the specialized equipment needed.
Complex Repairs
Some bike pedal issues are too complex for a home fix. For example, if the pedal axle is bent, it requires precise tools and skills. Misalignment can also cause major issues. If the pedal threads are stripped, fixing them needs special knowledge. Trying to repair these at home can worsen the damage.
Specialized Equipment
Professional bike mechanics use specialized equipment. These tools ensure a proper fix. For instance, a torque wrench is essential for pedal installation. It ensures the right tightness. Bike shops also have pedal extractors. These tools make removing pedals easier and safer.
| Problem | Required Tool | Recommendation |
|---|---|---|
| Bent Pedal Axle | Torque Wrench | Seek Professional Help |
| Stripped Pedal Threads | Pedal Extractor | Seek Professional Help |
- Bent Axle: Needs precision tools.
- Misalignment: Requires expert adjustment.
- Stripped Threads: Needs special fix.
Frequently Asked Questions
How Do I Fix A Broken Bike Pedal?
To fix a broken bike pedal, remove the damaged pedal using a wrench. Install a new one by screwing it in place. Ensure it’s tight.
Can I Ride With A Broken Pedal?
Riding with a broken pedal is dangerous. It can cause accidents and further damage your bike. Replace it immediately.
What Tools Do I Need To Replace A Bike Pedal?
You’ll need a pedal wrench or Allen key to remove and install bike pedals. These tools ensure a secure fit.
How Often Should Bike Pedals Be Replaced?
Bike pedals should be replaced every few years or when they show signs of wear and tear. Regular checks are essential.
Conclusion
Fixing a broken bike pedal is easier than you might think. With the right tools and a bit of patience, you can get back on the road quickly. Regular maintenance can prevent future issues. Always check your bike before each ride to ensure safety.
Happy cycling and stay safe!