
A short circuit on a motorcycle can be one of the most frustrating electrical issues a rider can encounter. Not only can it leave you stranded, but it can also cause damage to the bike’s electrical components if not addressed promptly. Understanding how to fix a short circuit on a motorcycle is essential for every rider, as it empowers you to resolve the problem efficiently and safely.
In this guide, we’ll take a deep dive into understanding short circuits, how to identify them, and the step-by-step process of fixing them on your motorcycle. Whether you are a seasoned mechanic or a beginner, this article provides clear, actionable insights to help you get your motorcycle back on the road quickly.
What is a Short Circuit on a Motorcycle?
Before jumping into how to fix a short circuit, let’s first define what a short circuit is. A short circuit occurs when an unintended path is created in the electrical wiring, allowing current to flow where it shouldn’t. This can happen if two wires come into direct contact or if there is a breakdown in the insulation, causing the electrical current to bypass the intended path and flow directly to the ground.
In motorcycles, short circuits can happen in several parts of the electrical system, including the wiring, the ignition system, or the battery. A short circuit is more than just an inconvenience – it can lead to sparks, overheating, or even fires if not corrected immediately.
Symptoms of a Short Circuit
Recognizing the symptoms of a short circuit is key to fixing the issue before it leads to further damage. Here are common signs that may indicate a short circuit in your motorcycle:
-
Blown Fuses: A blown fuse is often the first sign of a short circuit. If you find that your motorcycle’s fuses keep blowing, there’s likely a short circuit somewhere in the electrical system.
-
Electrical Components Not Working: When electrical components like lights, horn, or dashboard display stop working, it could point to a short circuit.
-
Burning Smell or Hot Wires: A short circuit may cause the wiring to overheat, potentially causing a burning smell or visible damage to the wires.
-
Sparks or Smoke: If you notice sparks or smoke coming from any electrical component, this is a clear indication of a short circuit that requires immediate attention.
-
Battery Draining Quickly: If your motorcycle’s battery keeps draining quickly, there may be a short circuit that’s causing excess power consumption.
Now that you know what a short circuit is and how to identify it, let’s dive into how to fix it.
Tools and Materials Needed
Before you begin fixing a short circuit on your motorcycle, make sure you have the right tools. Here’s a list of tools and materials that will help you diagnose and repair the issue:
-
Multimeter: For testing voltage, current, and resistance.
-
Screwdrivers: To remove screws or panels for accessing wires.
-
Wire Cutters/Strippers: For cutting or stripping wires.
-
Electrical Tape: To insulate and protect wires.
-
Soldering Iron: If you need to rejoin damaged wires.
-
Replacement Fuses: In case any fuses have blown.
-
Wrench Set: For loosening any components that are too tight.
-
Battery Terminals and Wires: If you need to replace damaged cables or terminals.
Step-by-Step Guide to Fix a Short Circuit on a Motorcycle
Step 1: Safety First
Before you start, safety should always be your top priority. Make sure to turn off the motorcycle and disconnect the battery. This will prevent any electrical shocks or further damage while you’re working on the bike. It’s also a good idea to wear gloves to protect your hands from any sharp objects or hot surfaces.
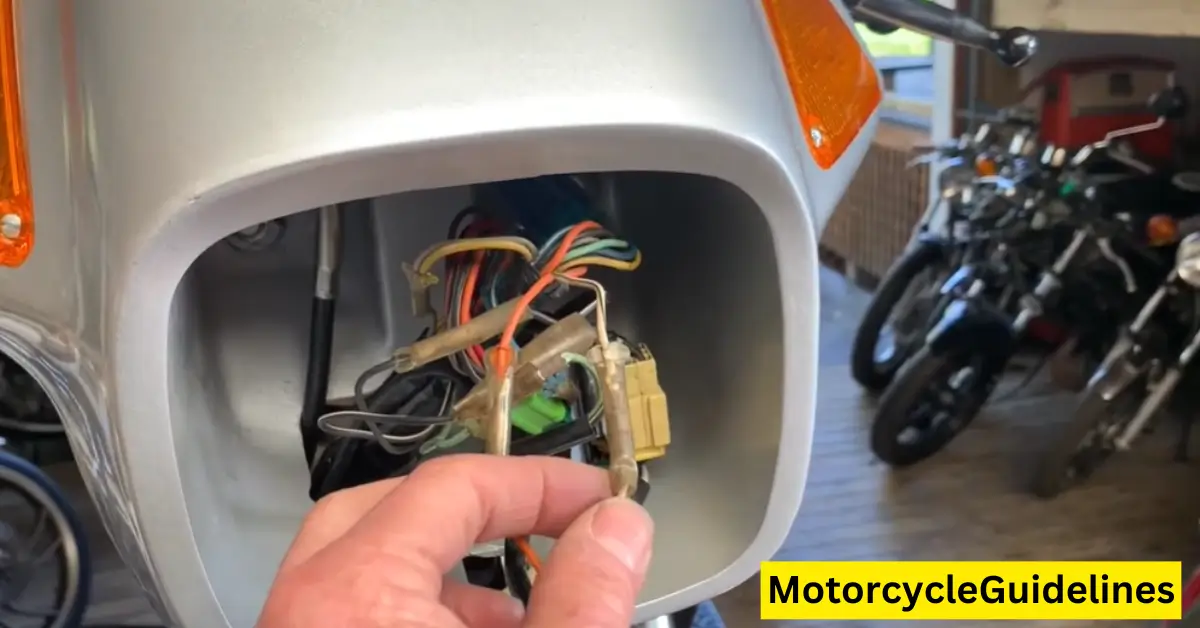
Step 2: Locate the Short Circuit
Finding the source of the short circuit is crucial for fixing the issue. Start by inspecting the electrical components one by one. Here’s how to locate the problem:
-
Check the Fuses: A blown fuse can indicate a short circuit. If the fuse is intact but electrical issues persist, it’s time to check the wiring.
-
Inspect the Wiring: Follow the wires from the battery to other components such as the lights, ignition system, and fuse box. Look for exposed wires, damaged insulation, or signs of wear. If you find any damaged wires, they are likely the source of the short.
-
Use a Multimeter: Set your multimeter to test for continuity. Touch the probes to the suspect wires or connectors and check for any continuity between wires that shouldn’t be connected. If there is continuity, it indicates a short circuit.
Step 3: Inspect the Battery and Grounding System
The battery is often at the center of electrical issues on motorcycles. A damaged battery or faulty grounding system can cause a short circuit. Here’s what to check:
-
Check the Battery Terminals: Ensure that the battery terminals are clean, tight, and free of corrosion. Loose or corroded terminals can cause electrical instability, leading to a short circuit.
-
Inspect the Grounding System: Make sure that all the ground wires are properly connected and there is no damage. Poor grounding is a common cause of electrical issues in motorcycles.
Step 4: Repair or Replace Damaged Wires
If you’ve identified any damaged wires or connectors, it’s time to repair them. Here’s how:
-
Cut and Strip the Damaged Wire: If the wire is severed or damaged, use wire cutters to remove the damaged section. Then use wire strippers to expose about an inch of wire on both ends.
-
Splice or Solder the Wire: Use a wire connector to join the two ends together or use a soldering iron to melt solder onto the wire for a secure connection.
-
Insulate the Wires: Once the wire is reconnected, use electrical tape to cover the joint. This will protect the wire from damage and prevent any future short circuits.
Step 5: Replace the Fuse
If you found a blown fuse during your inspection, it’s essential to replace it. Fuses are designed to prevent excess current from flowing through the system, which can lead to a fire. Here’s how to replace the fuse:
-
Locate the Fuse Box: The fuse box is usually located near the motorcycle’s battery or under the seat.
-
Remove the Old Fuse: Use your fingers or a pair of pliers to pull out the damaged fuse. Take it with you to a parts store to find the exact replacement.
-
Install the New Fuse: Insert the new fuse into the fuse box and test the electrical system to ensure the problem is fixed.
Step 6: Test the Motorcycle
Once you’ve completed the repairs, it’s time to test the motorcycle. Reconnect the battery and turn on the ignition. Test the lights, horn, and other electrical components to ensure that everything is functioning correctly. If you still experience issues, revisit the inspection process to check for any missed faults.
Step 7: Reassemble and Secure the Components
Finally, once the short circuit is fixed and the system is working correctly, reassemble any components you removed during the repair. Secure all connections, replace panels or covers, and ensure everything is properly in place.
Preventing Short Circuits on Your Motorcycle
While knowing how to fix a short circuit is essential, preventing them from happening in the first place can save you time, money, and frustration. By taking a few proactive steps to care for your motorcycle’s electrical system, you can avoid the headache of dealing with short circuits altogether.
1. Regularly Inspect the Wiring
Electrical wiring is the lifeblood of your motorcycle’s electrical system. Over time, wires can become worn out, frayed, or exposed, increasing the risk of a short circuit. Regularly inspecting the wiring is one of the best ways to prevent short circuits from happening.
-
How to Inspect: Look for any signs of fraying, cracks, or breaks in the wiring. Pay particular attention to areas where wires may rub against other components or where they bend sharply. These points are vulnerable to wear and tear.
-
Tip: If your motorcycle has been exposed to harsh weather or rough riding conditions, inspect the wiring more frequently, as these elements can speed up wear.
2. Use High-Quality Components
Using low-quality or cheap electrical components, such as fuses, wiring, and connectors, can lead to electrical issues down the line. It’s essential to use high-quality, durable parts that can withstand the heat, vibrations, and stresses that your motorcycle undergoes during operation.
-
Fuses: Always replace blown fuses with ones that match the exact specifications for your motorcycle. Using fuses with the wrong amperage can result in overheating and potential short circuits.
-
Wires and Connectors: Invest in high-quality wires with robust insulation to prevent them from becoming frayed or damaged. Make sure connectors are tightly secured and corrosion-resistant.
3. Maintain the Battery and Charging System
The battery is one of the most crucial components of your motorcycle’s electrical system. A poorly maintained battery can cause electrical issues, including short circuits. Regular battery maintenance can help ensure your electrical system runs smoothly.
-
Battery Care: Keep the battery terminals clean and free from corrosion. If you notice corrosion around the terminals, clean it off using a mixture of baking soda and water. Be sure to check for any loose connections, as this can cause electrical instability.
-
Charging System: Ensure the charging system is working correctly. If your battery is constantly draining or not holding a charge, it could indicate an issue with the alternator, regulator, or stator. These issues can lead to electrical problems, including short circuits.
4. Ensure Proper Grounding
A good grounding system is essential for the proper functioning of your motorcycle’s electrical system. If the ground wires are loose, corroded, or damaged, it can lead to a short circuit or erratic electrical behavior.
-
How to Check Grounding: Inspect the ground connections on your motorcycle to ensure they are clean, tight, and free from corrosion. Common grounding points include the battery, frame, and engine. If any of these connections are loose or corroded, it can cause electrical issues.
5. Protect the Electrical System from Moisture
Moisture is one of the most common causes of electrical problems in motorcycles, including short circuits. Rain, washing your bike, or riding in wet conditions can allow water to seep into electrical components, causing shorts or corrosion.
-
Protective Measures: Install waterproof covers for electrical components or ensure that they are sealed properly. When washing your bike, avoid spraying water directly onto sensitive electrical parts. After riding in the rain, dry your motorcycle thoroughly and inspect for any moisture build-up around wiring or components.
6. Regularly Check for Signs of Overheating
Excessive heat can cause damage to your motorcycle’s electrical system, leading to short circuits and other issues. Overheating can occur due to faulty components or improper maintenance.
-
Prevent Overheating: Ensure that your cooling system is functioning properly, especially if you have a liquid-cooled engine. Check for low coolant levels or signs of leaks. Additionally, check for any blockages in the radiator or air vents that might impair airflow and cause your engine to overheat.
7. Secure Loose Wires and Cables
Loose wires can easily come into contact with other parts of the motorcycle, creating a path for electrical current to flow where it shouldn’t. This can lead to a short circuit or damage to your motorcycle’s electrical components.
-
How to Secure Wires: Use zip ties, wire clips, or electrical tape to secure wires in place. Make sure that they are not rubbing against hot or sharp components. If wires are located near moving parts (such as the wheels or suspension), take extra care to secure them away from any danger.
8. Properly Store Your Motorcycle
If you don’t use your motorcycle regularly, it’s essential to store it properly to prevent electrical issues. When storing your motorcycle, ensure that the electrical components are protected from moisture, dust, and temperature extremes.
-
Storage Tips: Store your bike in a dry, well-ventilated space, preferably indoors, to protect it from environmental factors that could lead to electrical issues. If you need to store your bike for an extended period, consider disconnecting the battery to prevent unnecessary drain.
When to Seek Professional Help
While the tips above can help you prevent short circuits and maintain your motorcycle’s electrical system, there are instances where professional intervention is necessary. If you encounter complex electrical issues that you can’t identify or fix, it’s best to consult a professional mechanic who specializes in motorcycles.
-
Electrical System Diagnostics: Professional mechanics have the tools and expertise to diagnose electrical issues accurately. They can use advanced diagnostic equipment to pinpoint problems in the wiring, charging system, or other electrical components.
-
Complex Repairs: If your motorcycle’s wiring is severely damaged or the short circuit is affecting multiple components, it’s time to take it to a professional for repair. Attempting to fix complex electrical issues on your own can lead to further damage and safety hazards.

Conclusion: Fixing a Short Circuit on Your Motorcycle
Short circuits can be one of the most frustrating electrical issues that a motorcyclist can encounter. However, with the right tools, knowledge, and approach, most short circuits can be diagnosed and repaired quickly, allowing you to get back on the road with minimal downtime.
By following the step-by-step guide provided in this article, you can locate and fix a short circuit in your motorcycle’s electrical system. Start with safety, use the correct tools, and carefully inspect the wiring, battery, and components to identify the root cause. Whether it’s a simple fuse replacement or a more complex wiring repair, taking a systematic approach will help you tackle the issue with confidence.
Prevention is just as important as fixing the issue. Regular maintenance, proper storage, and securing wiring are all vital steps in ensuring your motorcycle’s electrical system remains in good condition and free from short circuits. By staying on top of these tasks, you can prevent many electrical problems before they even begin.
If you’re ever in doubt or the problem persists, don’t hesitate to seek professional help. Sometimes, complex electrical issues require a mechanic with specialized tools and experience to resolve.
Taking the right steps to fix and maintain your motorcycle’s electrical system will not only keep it running smoothly but also enhance your safety on the road.