
After replacing the head gasket, check for leaks and ensure proper coolant levels. Re-torque bolts as specified by the manufacturer.
After replacing a head gasket, it is crucial to take post-replacement steps to ensure the repair’s success and longevity. What to do after replacing head gasket includes inspecting for any coolant or oil leaks to prevent future engine damage. Verify that the coolant levels are correct to avoid overheating issues, as these checks are vital for maintaining your vehicle’s engine health.
Tightening the head bolts to the manufacturer’s specifications is essential for a secure seal. Regularly monitor your engine’s performance and fluid levels in the days following the replacement. These steps help ensure your vehicle runs smoothly and efficiently after the repair. Proper maintenance will extend the life of your engine and improve its reliability.
Initial Inspection
After replacing the head gasket, an initial inspection is vital. This step ensures your engine runs smoothly and prevents future problems.
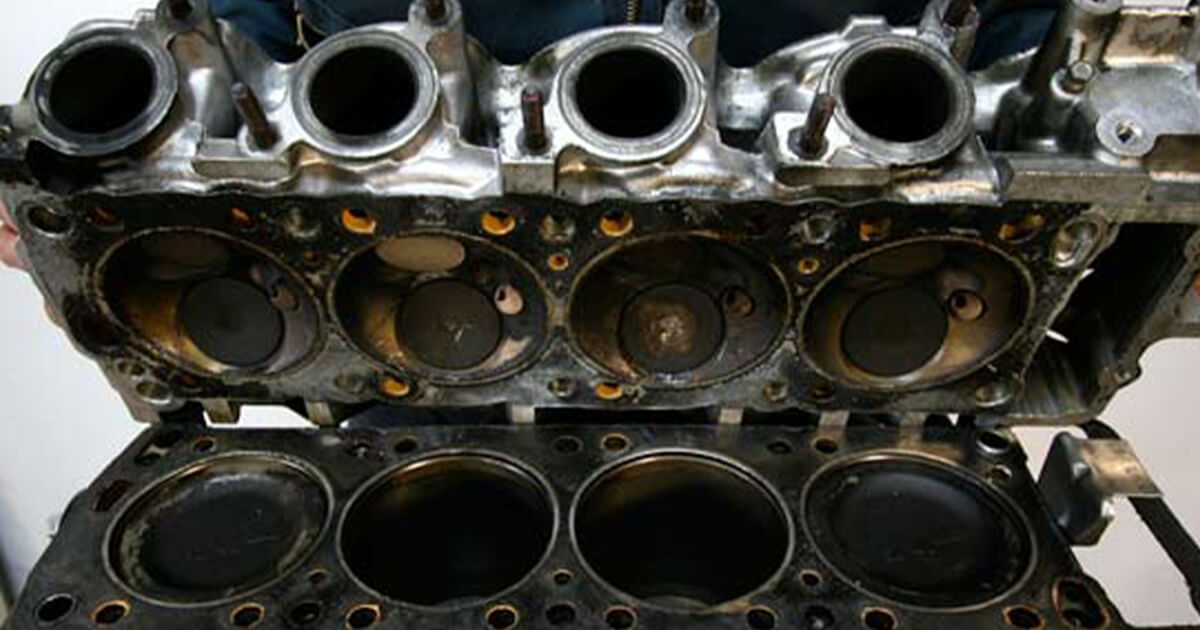
Check For Leaks
First, check for leaks. Look around the engine for oil or coolant leaks. Use a flashlight to see better. Leaks can cause engine damage if left unchecked.
Inspect these areas carefully:
- Around the head gasket
- Under the engine
- Near the radiator
If you find any leaks, fix them immediately. This step keeps your engine safe and extends its life.
Verify Torque Settings
Next, verify torque settings. Ensuring proper torque is crucial for engine performance. Use a torque wrench for accuracy.
Follow these steps:
- Refer to your vehicle’s service manual for torque specs.
- Check each bolt in the correct sequence.
- Use the torque wrench to verify the settings.
Proper torque settings prevent gasket failure and ensure a secure engine seal.
By following these steps, you can ensure your engine runs smoothly. Regular inspections help maintain your vehicle’s health.

Credit: www.kseal.com
Coolant System
After replacing a head gasket, your car’s coolant system needs attention. This system keeps the engine from overheating. Follow these steps to ensure your car runs smoothly.
Refill Coolant
First, you need to refill the coolant. Use the right type for your car.
- Open the coolant reservoir cap.
- Pour in the coolant slowly.
- Fill until it reaches the “Full” mark.
Using the correct coolant is crucial. It prevents engine damage. Check your car’s manual for details.
Bleed Air From System
Next, you must bleed the air from the system. Air bubbles can cause overheating.
- Locate the bleeder valve. It is usually near the thermostat.
- Open the valve carefully. Do this while the engine is cold.
- Let the air escape. Close the valve when coolant starts flowing steadily.
Repeat this process if needed. Ensure no air remains in the system.
These steps are essential after replacing a head gasket. Proper care of the coolant system ensures your car runs efficiently.
Oil Change
After replacing the head gasket, you need to perform an oil change. This ensures your engine runs smoothly and remains in good condition. Let’s dive into the steps involved.
Drain Old Oil
First, you need to drain the old oil. This removes any contaminants.
- Place an oil pan under the drain plug.
- Use a wrench to remove the drain plug.
- Let the oil drain completely into the pan.
- Replace the drain plug once the oil has drained.
Replace Oil Filter
Next, you need to replace the oil filter. This step is crucial for keeping the engine clean.
- Locate the oil filter on your engine.
- Use an oil filter wrench to remove the old filter.
- Apply a small amount of new oil to the gasket of the new filter.
- Screw the new filter into place by hand. Tighten it securely.
After these steps, you can add the new oil to your engine. Make sure to use the type and amount specified in your vehicle’s manual. This will keep your engine running smoothly and extend its life.
Engine Testing
After replacing a head gasket, the next crucial step is engine testing. Ensuring the engine runs smoothly will help avoid further issues. Let’s break down the steps to test your engine effectively.
Warm Up Engine
Start by warming up the engine. Turn on the car and let it idle. This allows the engine to reach its normal operating temperature. Ensure the car is in a well-ventilated area to avoid harmful fumes. Pay attention to any unusual noises during this warm-up phase.
Monitor Temperature
Next, closely monitor the engine temperature. Use the car’s dashboard gauge to keep an eye on it. The temperature should stay within the normal range. If it starts to rise, this could indicate a problem.
| Temperature Gauge | Action |
|---|---|
| Normal | No action needed |
| High | Turn off engine immediately |
During the test, check for coolant leaks. Any leaks could indicate a problem with the head gasket installation. Also, ensure the coolant level remains stable. Low levels might suggest a leak.
- Check for leaks
- Ensure stable coolant levels
- Watch the temperature gauge
After the engine has warmed up and you have monitored the temperature, turn off the engine. Let it cool down for a few minutes. This ensures you get accurate readings and identify any issues that might arise during the cooling phase.
Compression Test
After replacing the head gasket, performing a compression test is crucial. This test ensures your engine’s cylinders are sealing properly. It helps identify potential issues early. Let’s dive into the steps of a compression test.
Check Cylinder Pressure
First, gather your tools. You’ll need a compression gauge and a wrench. Follow these steps:
- Warm up the engine to its normal temperature.
- Turn off the engine and disconnect the ignition coil.
- Remove all spark plugs using the wrench.
- Insert the compression gauge into the first spark plug hole.
- Crank the engine 4-5 times.
- Note the reading on the gauge.
- Repeat for all cylinders.
Evaluate Results
After checking the pressure, compare your readings. Use the table below for guidance:
| Cylinder Number | Pressure Reading (PSI) |
|---|---|
| 1 | – |
| 2 | – |
| 3 | – |
| 4 | – |
Normal compression pressure should be between 120 and 160 PSI. A difference of more than 15% between cylinders indicates a problem. Low pressure in one or more cylinders could mean:
- Worn piston rings
- Leaking valves
- Faulty head gasket
High compression results might indicate carbon buildup in the cylinder. Recheck your readings for accuracy.
Credit: www.mobil.com
Drive Test
After replacing your head gasket, conducting a drive test is crucial. This step helps ensure the repair was successful and your vehicle runs smoothly. Below, we outline the steps for a thorough drive test.
Short Distance Drive
Start with a short distance drive. This could be around your neighborhood or a nearby parking lot. Keep the drive under 10 miles. This allows you to monitor the car’s performance without straying too far from home. Look for any immediate issues like overheating or loss of power.
| Checklist | Description |
|---|---|
| Temperature Gauge | Ensure the temperature gauge stays within normal range. |
| Power | Check if the car responds well to acceleration. |
| Leaks | Look for any fluid leaks under the car. |
Listen For Unusual Noises
During the drive test, listen for unusual noises. These can include knocking, ticking, or hissing sounds. Such noises can indicate issues with the gasket or other engine parts. Pay attention to the engine’s sound while accelerating and decelerating. If you hear anything strange, stop the car and inspect the engine.
- Knocking Sounds: Could indicate a problem with the engine’s internal components.
- Ticking Sounds: Might suggest issues with the valve train.
- Hissing Sounds: Often a sign of a coolant or vacuum leak.
Use these steps to ensure your car is in optimal condition after replacing the head gasket. A successful drive test means you can drive with confidence.
Final Adjustments
After replacing the head gasket, making final adjustments is crucial. These steps ensure your engine runs smoothly and efficiently. Neglecting this part can lead to future engine issues. Follow these simple steps to complete your head gasket replacement process.
Tighten Bolts
Start by tightening all bolts to the manufacturer’s specifications. Use a torque wrench to get accurate readings. Tightening bolts properly prevents leaks and ensures engine integrity.
- Check each bolt twice to ensure they are secure.
- Follow the tightening sequence recommended by the manufacturer.
- Use the correct torque settings for each bolt type.
Inspect Belts And Hoses
Inspect all belts and hoses for any signs of wear or damage. Replace any that look worn out or cracked. This step ensures your engine runs smoothly without interruptions.
| Component | Action |
|---|---|
| Belts | Check tension and replace if worn |
| Hoses | Inspect for cracks and replace if damaged |
Ensuring belts and hoses are in good condition helps prevent future breakdowns. Always use quality parts to replace any damaged components.
Regular Maintenance
After replacing a head gasket, regular maintenance is crucial. This helps to keep your car in good condition. Performing regular checks ensures the longevity of the new gasket and the engine.
Schedule Future Checks
Scheduling future checks is vital. Regular inspections identify potential issues early. This helps to prevent costly repairs. It is recommended to visit a mechanic every six months. They can inspect the head gasket and other engine parts.
- Every 6 months: Mechanic inspection
- Every 3 months: Self-inspection of engine parts
Keep a log of all inspections. This helps track the condition of your car. A maintained log can also be useful if you sell your car.
Keep An Eye On Fluids
Fluids play a crucial role in your car’s health. Regularly checking fluid levels ensures the engine runs smoothly. Low fluid levels can cause overheating and damage the head gasket.
| Fluid Type | Check Frequency |
|---|---|
| Coolant | Weekly |
| Engine Oil | Monthly |
| Brake Fluid | Quarterly |
Use a dipstick to check engine oil. Ensure coolant levels are between the minimum and maximum marks. Always top up fluids as needed.
Regular maintenance is key to a healthy car. Keep these tips in mind for a smooth ride.

Credit: m.youtube.com
Frequently Asked Questions
What Should I Check After Replacing The Head Gasket?
After replacing the head gasket, check for coolant leaks. Also, ensure the engine oil is clean. Verify the engine temperature is stable.
How Long Does It Take To Break In A New Head Gasket?
Breaking in a new head gasket typically takes about 500 miles. Drive gently and avoid high RPMs during this period.
Can I Drive Immediately After Replacing The Head Gasket?
Yes, you can drive immediately. However, drive gently. Avoid high speeds and hard acceleration for the first few hundred miles.
What Are Signs Of A Bad Head Gasket Replacement?
Signs of a bad head gasket replacement include coolant leaks, engine overheating, and white smoke from the exhaust. Check these immediately.
Conclusion
After replacing the head gasket, ensure all components are correctly reassembled to avoid any complications. Knowing what to do after replacing the head gasket is essential—check for leaks and monitor engine performance closely. Regular maintenance and timely inspections will prolong your engine’s life. Stay proactive to prevent future issues, as understanding what to do after replacing head gasket can make a big difference. Following these steps will keep your vehicle running smoothly and efficiently.