
The 1,000-mile service for Harley-Davidson motorcycles is a crucial milestone that ensures your bike is operating at its peak performance. This initial service check is designed to address several key maintenance tasks that can prevent future issues and prolong the life of your motorcycle.
Whether you just purchased a brand-new Harley or are a seasoned rider, understanding and implementing this service is vital. It’s not just about changing the oil; it’s a comprehensive assessment of the motorcycle’s overall health.
This article will provide a comprehensive checklist of what to expect during your Harley 1000-mile service, including essential inspections, replacements, and adjustments. Whether you plan to perform the service yourself or take it to a certified mechanic, this guide will equip you with the necessary information to keep your Harley running smoothly.
Overview of the 1000 Mile Service
The 1,000-mile service is an essential maintenance check for Harley-Davidson motorcycles, marking the first significant evaluation of your bike’s performance. This service is critical as it addresses a variety of components that must function optimally for a safe ride.
Regular maintenance in the early stages of motorcycle ownership can prevent more severe and costly issues down the road.
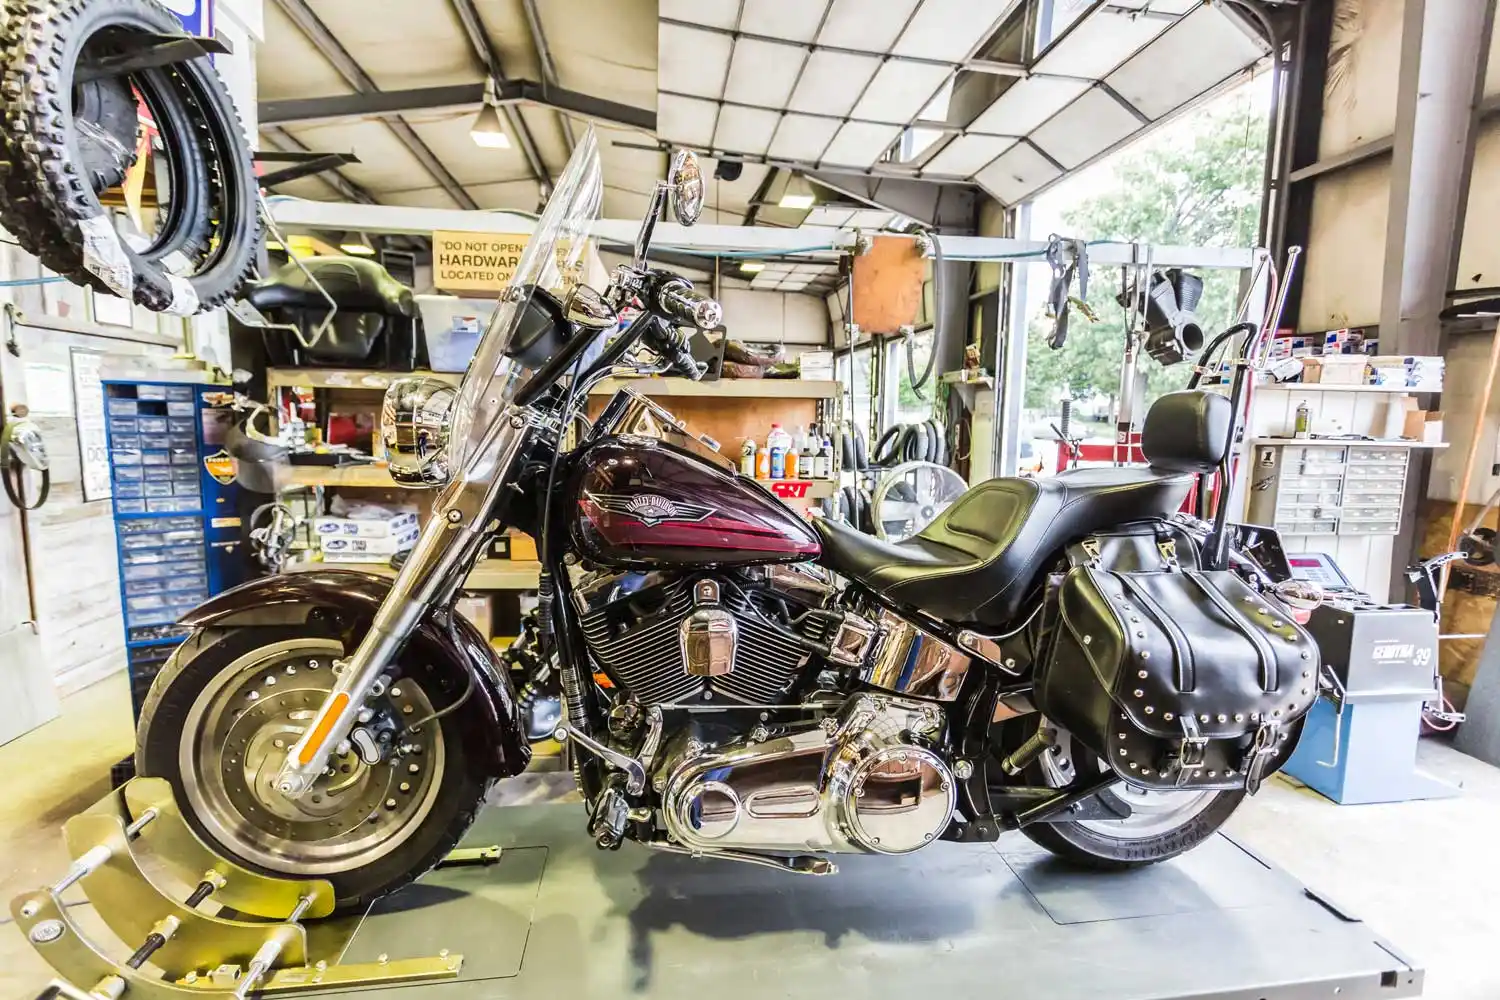
Importance of Regular Maintenance
Regular maintenance is not just a suggestion; it’s a necessity for the longevity of your motorcycle. The 1,000-mile service helps ensure that critical components of your Harley are functioning correctly and efficiently.
Following the manufacturer’s recommended service intervals can significantly enhance the reliability of your bike, providing a smoother and safer riding experience.
Common Issues Avoided by Early Service
Performing the 1,000-mile service can help identify and resolve potential issues before they escalate. Common problems include oil leaks, brake system failures, and tire wear, which can compromise safety.
By addressing these issues early, riders can avoid expensive repairs and maintain optimal performance.
Warranty Considerations
Another essential aspect of the 1,000-mile service is the warranty implications. Many manufacturers, including Harley-Davidson, require that the initial service be performed by a certified mechanic to maintain warranty coverage.
Failing to complete this service can result in warranty voidance for issues arising from improper maintenance.
| Service Type | Warranty Coverage | Without Service |
|---|---|---|
| 1,000 Mile Service | Maintains warranty | Warranty voidance risk |
| Regular Maintenance | Ensures longevity | Higher repair costs |
As seen in the table above, completing the 1,000-mile service is critical for maintaining warranty coverage, which can save you significant costs in the long run. Notably, adhering to this service not only protects your warranty but also ensures the motorcycle’s longevity and performance.
Regular maintenance is a proactive approach that helps identify minor issues before they evolve into major problems.
Engine Oil and Filter Change
One of the most important tasks during the 1,000-mile service is changing the engine oil and replacing the oil filter. This procedure is essential for ensuring that the engine runs smoothly and efficiently.
Engine oil lubricates the moving parts, reduces friction, and carries away debris generated during operation.
Types of Engine Oil
When it comes to engine oil, Harley-Davidson recommends using synthetic oil for optimal performance. Synthetic oils are formulated to provide better lubrication and protection to the engine components.
The specific oil type may vary based on the model year and specific engine used in your Harley, so it’s essential to consult your owner’s manual for the correct specifications.
Steps for Changing Oil and Filter
Changing the engine oil and filter involves several steps:
- Warm up the engine to thin the oil for easier drainage.
- Use a wrench to remove the oil drain plug and allow the old oil to drain completely.
- Replace the oil filter using an oil filter wrench.
- Reinstall the drain plug and refill the engine with new oil.
Signs of Oil Contamination
Contaminated oil can severely impact the performance of your engine. Look for signs such as dark, gritty oil or a burnt smell.
If the oil appears milky, it may indicate coolant contamination, which requires immediate attention.
| Harley Model | Recommended Oil Type |
|---|---|
| Sportster | 20W-50 Synthetic |
| Softail | 20W-50 Synthetic |
| Touring | 20W-50 Synthetic |
The table shows the recommended oil types for various Harley-Davidson models. Using the correct oil type is integral to maintaining engine performance and longevity.
For instance, synthetic 20W-50 oil is universally recommended across different models, ensuring optimal lubrication under varying conditions. By adhering to these recommendations, riders can improve engine efficiency and reduce wear on components, ultimately leading to a more reliable and enjoyable riding experience.
Brake System Inspection
The brake system is one of the most critical safety components of your motorcycle. During the 1,000-mile service, a thorough inspection of the brake system is necessary to ensure that all parts are functioning correctly and safely.
Inspecting Brake Pads and Discs
Brake pads and discs should be inspected for wear. Look for uneven wear on the pads, and ensure that the discs are not warped or damaged.
If the thickness of the pads is below the recommended level, they should be replaced immediately to maintain braking performance.
Checking Brake Fluid Levels
Check the brake fluid reservoir to ensure that it is at the proper level. If the fluid has a dark color or appears contaminated, it should be replaced as well.
Regularly changing the brake fluid prevents moisture buildup, which can lead to brake failure.
Brake Line Inspections for Leaks
Inspect all brake lines for signs of leaks or wear. Any indication of fluid leakage requires immediate attention, as it can compromise braking efficiency.
Ensure all connections are secure and free from corrosion.
| Brake Component | Recommended Action | Average Lifespan |
|---|---|---|
| Brake Pads | Inspect and replace if worn | 20,000 miles |
| Brake Fluid | Change every 2 years | N/A |
| Brake Discs | Inspect for warping | 30,000 miles |
The table illustrates the recommended actions for various brake components along with their average lifespans. Regular inspection and maintenance of brake pads, fluid, and discs are crucial in ensuring optimal braking performance and rider safety.
Notably, brake pads have a lifespan of approximately 20,000 miles, indicating the necessity of timely inspections to prevent potential brake failure. Furthermore, changing the brake fluid every two years is essential to maintain the hydraulic system’s integrity, thereby ensuring the reliability of the braking system.
Air Filter Maintenance
The air filter plays a vital role in maintaining engine performance. A clean air filter ensures that the engine receives adequate airflow, which is critical for combustion efficiency.
Types of Air Filters
Harley-Davidson motorcycles typically use either paper or foam air filters. Paper filters are disposable, while foam filters can be cleaned and reused.
Understanding the type of air filter your motorcycle uses is essential for effective maintenance.
Steps for Cleaning or Replacing the Filter
To clean or replace the air filter:
- Remove the air filter cover using a screwdriver or wrench.
- If using a paper filter, replace it with a new one. For foam filters, clean it with soap and water, then allow it to dry completely.
- Reassemble the filter cover securely.
Signs of a Clogged Air Filter
A clogged air filter can lead to a decrease in engine performance, reduced fuel efficiency, and increased emissions. Signs include a rough idle, decreased acceleration, or an illuminated check engine light.
| Air Filter Type | Maintenance Action | Impact on Performance |
|---|---|---|
| Paper | Replace every 10,000 miles | Improves airflow |
| Foam | Clean every 5,000 miles | Enhances combustion |
The above table outlines the maintenance actions required for different air filter types. Regular maintenance of the air filter directly impacts engine performance; a clean filter can improve airflow, leading to better combustion and enhanced fuel efficiency.
For instance, replacing paper filters every 10,000 miles ensures that the engine receives optimal airflow, while cleaning foam filters every 5,000 miles provides a balance between performance and cost-effectiveness. Neglecting air filter maintenance can result in decreased engine responsiveness and higher emissions, highlighting the importance of this routine check.
Tire and Wheel Check
Tire maintenance is crucial for safe handling and ride quality. During the 1,000-mile service, it’s essential to check not only the tire pressure but also the overall condition of the tires and wheels.
Checking Tire Pressure
Proper tire pressure is vital for optimal performance and safety. Use a reliable tire pressure gauge to check the pressure before each ride.
Adjust the pressure according to the manufacturer’s specifications found in your owner’s manual.
Inspecting Tread Depth
Inspect the tread depth to ensure adequate grip on the road. Use the penny test—insert a penny into the tread with Lincoln’s head facing down.
If you can see all of Lincoln’s head, it’s time to replace the tire.
Wheel Spoke Tightness
Check the tightness of the wheel spokes, especially on spoked wheels. Loose spokes can lead to wheel failure, which is a serious safety hazard.
Ensure all spokes are evenly tightened to the manufacturer’s specifications.
| Harley Model | Recommended Tire Pressure (Front/Rear) |
|---|---|
| Sportster | 36/42 psi |
| Softail | 36/40 psi |
| Touring | 36/42 psi |
The table above provides recommended tire pressures for various Harley models. Maintaining proper tire pressure is essential for ensuring safe handling and ride quality.
For example, a Sportster requires 36 psi in the front tire and 42 psi in the rear. Under-inflated tires can lead to poor handling and increased tire wear, while over-inflated tires may cause a harsh ride and reduce traction.
Regularly checking and adjusting tire pressures not only enhances performance but also contributes to rider safety.
Chain and Sprocket Adjustments
Proper maintenance of the chain and sprockets is essential for the bike’s drivetrain efficiency. During the 1,000-mile service, checking the primary chain and rear drive belt is critical.
Signs of Chain Wear
A worn chain can exhibit signs such as stiff links, rust, or noticeable elongation. If any of these symptoms are present, it is crucial to replace the chain to avoid potential damage to the sprockets or other drivetrain components.
Adjusting Tension
To adjust the chain tension, refer to the service manual for your specific model. Typically, tension can be adjusted using the adjustment bolts located at the rear of the swingarm.
The goal is to achieve the recommended slack as specified by the manufacturer.
Lubrication Techniques
Regular lubrication is necessary to keep the chain functioning correctly. Use a high-quality chain lubricant and apply it evenly while rotating the wheel to ensure full coverage.
Avoid over-lubrication as it can attract dirt and debris.
| Maintenance Task | Interval | Recommended Product |
|---|---|---|
| Chain Lubrication | Every 500 miles | Chain lube spray |
| Chain Adjustment | Every 1,000 miles | N/A |
The table outlines the maintenance tasks required for the chain, along with their recommended intervals. Regular lubrication every 500 miles is essential for preventing wear and tear, while adjusting the chain every 1,000 miles ensures proper tension.
Using a dedicated chain lube spray can significantly enhance the chain’s longevity, reducing the risk of failure during operation. Proper chain maintenance not only extends the life of the chain but also contributes to the overall efficiency of the motorcycle’s drivetrain.
Electrical System Check
The electrical system of your Harley is critical for its operation. Checking the battery, lights, and other electrical components during the 1,000-mile service is vital to ensure everything is functioning correctly.
Battery Maintenance
Regularly checking the battery is essential for avoiding starting issues. Inspect the battery terminals for corrosion and ensure connections are tight.
If the battery is removable, consider taking it out for a thorough cleaning.
Inspecting Electrical Connections
Check all electrical connections, including those for the lights and switches. Loose or corroded connections can lead to electrical failures, which can be dangerous while riding.
Checking Light Functionality
Ensure that all lights, including headlights, tail lights, and turn signals, are functioning correctly. A burned-out bulb can lead to visibility issues and may result in accidents.
| Component | Maintenance Action | Average Lifespan |
|---|---|---|
| Battery | Check and clean terminals | 3-5 years |
| Light Bulbs | Inspect and replace as needed | 1-2 years |
The table provides an overview of essential electrical components and their maintenance actions. Regular checks of the battery and light bulbs can prevent significant issues while riding.
For instance, the average lifespan of a motorcycle battery is 3-5 years, and regular maintenance can significantly extend its usability. Likewise, routine inspection of light bulbs ensures optimal visibility, which is paramount for safety.
By paying attention to these electrical components, riders can enhance the reliability of their motorcycles.
Exhaust System Inspection
The exhaust system must be inspected during the 1,000-mile service. Looking for leaks and ensuring secure attachments are vital steps in maintaining the motorcycle’s performance and reducing emissions.
Inspecting for Cracks and Leaks
Inspect the exhaust pipes and mufflers for any signs of cracks or leaks. A leak can not only affect performance but can also pose safety hazards due to toxic emissions.
Tightening Fasteners
Ensure that all exhaust fasteners are tight. Loose connections can lead to exhaust leaks, which can diminish engine performance and increase noise levels.
Signs of Exhaust Issues
Common signs of exhaust problems include a loud exhaust noise, a strong smell of fuel, or excessive smoke. If any of these symptoms are observed, further inspection is necessary.
| Exhaust Issue | Recommended Action |
|---|---|
| Cracks | Replace affected sections |
| Leaking joints | Tighten or replace fasteners |
The table highlights common exhaust issues and the corresponding recommended actions. Addressing cracks promptly is crucial, as they can lead to significant performance issues and safety hazards.
Likewise, ensuring that all joints are tight and secure can prevent leaks, thereby maintaining optimal engine performance. Regular inspections of the exhaust system should be part of routine maintenance to ensure compliance with safety and environmental standards.
Road Test
After completing the service, a road test is imperative. This final step allows you to verify that all systems are functioning correctly and helps identify any lingering issues.
What to Look for During a Test Ride
During the test ride, pay close attention to the engine’s response, braking performance, and any unusual noises. A smooth operation indicates that the service was successful.
Common Issues to Check After Service
After service, be aware of potential issues such as fluid leaks, unusual vibrations, or warning lights on the dashboard. Any abnormalities should be addressed immediately.
Reporting Problems
If you notice any issues during the road test, report them to your mechanic or service provider as soon as possible. Documenting concerns can help in diagnosing and resolving problems more efficiently.
| Post-Service Issue | Recommended Action |
|---|---|
| Fluid Leaks | Inspect and repair leaks |
| Warning Lights | Run a diagnostic check |
The table presents common post-service issues and their recommended actions. Addressing fluid leaks promptly is essential, as they can lead to more significant complications if left unattended.
Additionally, any warning lights should prompt a diagnostic check, ensuring that no underlying issues are present. A thorough road test after servicing not only confirms that the motorcycle is in good working order but also enhances the rider’s confidence in the bike’s reliability.
FAQs about Harley 1000 Mile Service Checklist
What is included in the Harley 1000-mile service?
The Harley 1000-mile service includes a comprehensive inspection and maintenance of various components. Key tasks involve changing the engine oil and filter, inspecting and adjusting the brake system, checking tire pressure and tread, inspecting the air filter, and evaluating the condition of the electrical system and exhaust.
Additionally, a road test is performed to ensure everything is functioning correctly. This initial service is crucial for the longevity and performance of your motorcycle.
Can I perform the 1000-mile service myself?
Yes, many riders choose to perform the 1000-mile service themselves, especially if they have mechanical experience. However, it is essential to follow the service manual closely to ensure that all tasks are completed correctly.
That said, for those unfamiliar with motorcycle maintenance or those wishing to maintain warranty coverage, it is advisable to have the service performed by a certified Harley mechanic. This ensures that all checks are performed thoroughly and professionally.
How much does the 1000-mile service cost at a dealership?
The cost of the 1000-mile service at a dealership can vary based on location and specific services performed. On average, riders can expect to pay between $400 and $600.
This cost includes labor and parts, ensuring that all necessary checks and replacements are completed by trained technicians. While this may seem expensive, it provides peace of mind and helps maintain warranty coverage.
What happens if I miss the 1000-mile service?
Missing the 1000-mile service can have several consequences, including potential warranty voidance. If issues arise later that were preventable through this service, the manufacturer may deny warranty claims.
Additionally, neglecting this service can lead to more serious mechanical problems, resulting in costly repairs down the line. Regular maintenance is vital to ensure your motorcycle operates safely and efficiently.
How often should I service my Harley after the 1000-mile mark?
After the 1000-mile service, it is generally recommended to service your Harley every 5,000 miles. This routine maintenance schedule helps ensure that all critical components are functioning correctly and that the motorcycle remains safe to ride.
Be sure to consult your owner’s manual for specific maintenance intervals and tasks tailored to your model, as some Harley models may require more frequent checks.
Conclusion
The 1,000-mile service is a vital step in ensuring the long-term performance and reliability of your Harley-Davidson motorcycle. By following this checklist, either through a professional service or a DIY approach, you can help prevent potential issues and maintain your bike’s value.
Regular maintenance not only enhances performance but also provides peace of mind on the road. Remember to keep records of all services performed, as they can be beneficial for warranty purposes and future resale value.