
In this article, we will explore the common issue faced by motorcycle owners when their bike shows no power despite having a fully charged battery. This scenario can be frustrating and confusing, especially for those who are not well-versed in motorcycle electrical systems.
We’ll provide a comprehensive overview of potential causes for this problem that Motorcycle Has No Power But Battery Is Good, including faulty connections, blown fuses, and malfunctioning components. By the end of this guide, readers will have a clearer understanding of the troubleshooting process and steps they can take to identify and resolve the issue effectively.
Understanding the Basics of Motorcycle Electrical Systems
A motorcycle’s electrical system is crucial for its operation, controlling everything from starting the engine to powering lights and other accessories. Understanding the basic components of this system can help in troubleshooting issues like no power despite a good battery.
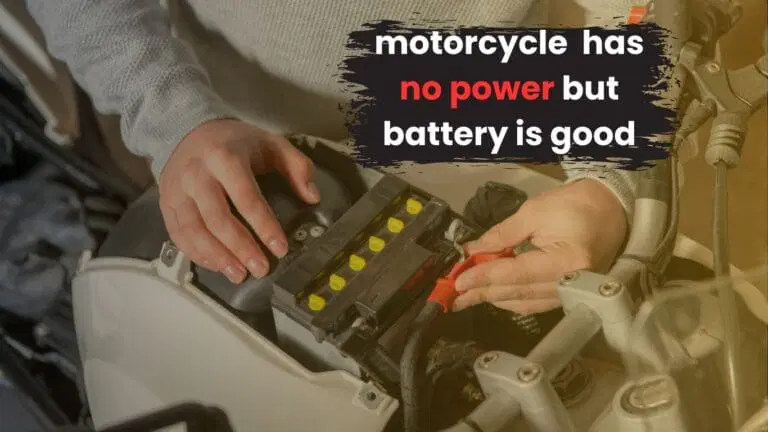
Key Components of the Electrical System
The main components of a motorcycle’s electrical system include the battery, fuses, ignition switch, starter relay, and the regulator/rectifier. The battery provides the initial power to start the engine and operates the electrical accessories.
Fuses protect the circuit from overload, while the ignition switch controls the flow of electricity to the ignition system. The starter relay activates the starter motor, and the regulator/rectifier manages the voltage and current coming from the alternator to keep the battery charged.
How Power Flows Through the System
When the ignition key is turned on, power flows from the battery through the ignition switch. If the switch is functioning correctly, it allows electricity to flow to the starter relay, which in turn sends power to the starter motor.
This power flow is essential for starting the engine. After the engine starts, the alternator generates electricity, which is regulated by the regulator/rectifier to charge the battery and power the motorcycle’s electrical components.
Common Symptoms of Electrical Issues
- No lights or dashboard indicators illuminate when the ignition is turned on.
- The starter motor does not engage when the start button is pressed.
- Clicking sounds when attempting to start, indicating insufficient power.
- Dim lights or flickering when the bike is running, suggesting voltage regulation issues.
Understanding these symptoms helps in diagnosing the electrical issues a motorcycle may face, providing a clearer direction for troubleshooting.
Initial Checks: Battery and Connections
The first step in troubleshooting a motorcycle that has no power despite a good battery is to check the battery and its connections. Even if the battery is new and fully charged, poor connections can prevent power from flowing to the bike’s electrical system.
Inspecting Battery Terminals
Start by ensuring that the battery terminals are properly connected. Loose or poorly fitted terminals can cause intermittent power loss.
Use a wrench to tighten the terminal connections, ensuring they are snug but not overly tight, which can damage the battery posts.
Checking for Corrosion
Corrosion at the battery terminals can impede electrical flow. Inspect the terminals for any signs of white or greenish buildup.
If corrosion is present, clean the terminals with a mixture of baking soda and water, followed by rinsing with clean water. After cleaning, reattach the terminals securely.
Testing Battery Voltage
To confirm that the battery is indeed good, use a multimeter to test its voltage. A healthy, fully charged motorcycle battery should read between 12.6 to 12.8 volts when not connected to any load.
If the voltage is significantly lower, the battery may need charging or replacement.
| Battery Voltage Status | Action Required |
|---|---|
| 12.6 – 12.8 V | Battery is good |
| 12.4 V | Charge the battery |
| Below 12.4 V | Replace the battery |
This table summarizes the voltage readings you should expect from a healthy battery and the actions needed based on those readings. Testing the battery voltage is a critical step in diagnosing power issues, as it provides insight into the battery’s condition.
Inspecting Fuses and Circuit Breakers
After checking the battery, the next step is to inspect the fuses and circuit breakers. Fuses protect the electrical system from overload, and a blown fuse can lead to a complete loss of power.
Locating the Fuse Box
The fuse box is typically located under the seat or near the battery. Consult the motorcycle’s owner’s manual to find the exact location.
Once located, remove the cover to access the fuses.
Identifying Blown Fuses
Visually inspect each fuse to see if the metal strip inside is broken or burnt. If you suspect a fuse is blown, use a multimeter to test for continuity.
A fuse that shows no continuity must be replaced.
Replacing Fuses
When replacing fuses, ensure that you use the correct amperage. Using a fuse with a higher rating can lead to further electrical damage.
After replacing a blown fuse, try starting the motorcycle again.
| Fuse Rating | Function |
|---|---|
| 30 Amp | Main Power Supply |
| 15 Amp | Ignition Circuit |
| 10 Amp | Accessory Power |
The table above highlights common fuse ratings and their functions in the motorcycle’s electrical system. Understanding which fuses serve which components is essential for effective troubleshooting.
Investigating the Ignition System
If the battery and fuses are in good condition, the next area to investigate is the ignition system. The ignition switch and related components are crucial for allowing electrical power to flow to the starter motor and other systems.
Understanding the Ignition Switch
The ignition switch controls the power to various electrical components. If the switch is faulty, it may not properly allow power to flow, resulting in a no-start condition.
Test the ignition switch for electrical continuity using a multimeter.
Troubleshooting the Kill Switch
The kill switch can sometimes be accidentally engaged, preventing the bike from starting. Make sure the kill switch is in the “run” position before troubleshooting further.
Checking the Wiring Harness
Inspect the wiring harness for any signs of damage, such as frayed wires or loose connections. Pay particular attention to connectors that may have corroded over time.
A damaged harness can prevent power from reaching the starter motor or other critical systems.
| Component | Symptoms of Failure |
|---|---|
| Ignition Switch | No power to lights or starter |
| Kills Switch | No start, no lights |
| Wiring Harness | Electrical shorts, intermittent power |
This table outlines key components of the ignition system and their symptoms if they are malfunctioning. Identifying issues with these components can lead to a quicker resolution of the power loss problem.
Evaluating Starter Relay and Starter Circuit
The starter relay is an essential component that connects the battery to the starter motor. If the relay is faulty, it can prevent the motorcycle from starting altogether.
Testing the Starter Relay
To test the starter relay, use a multimeter to check for electrical continuity. When the start button is pressed, the relay should engage and allow power to flow to the starter motor.
If there is no continuity, the relay may need to be replaced.
Checking the Starter Motor
If the starter relay tests fine, the next step is to check the starter motor itself. Ensure that all connections to the starter motor are secure and free from corrosion.
A faulty starter motor can also cause a no-start condition.
Identifying Wiring Issues
Inspect the wiring leading to the starter motor for any signs of fraying or damage. A short in the wiring can also result in a loss of power.
Use a multimeter to check for continuity in the starter circuit.
| Starter Circuit Component | Testing Method |
|---|---|
| Starter Relay | Check for continuity when engaged |
| Starter Motor | Check for secure connections and test functionality |
| Wiring | Check for shorts and continuity |
This table provides a clear overview of components within the starter circuit and how to test them effectively. Ensuring each component functions correctly is vital for resolving the power issue.
Examining the Regulator/Rectifier
The regulator/rectifier plays a crucial role in the motorcycle’s electrical system by converting AC voltage from the alternator into DC voltage for the battery and other components. A malfunctioning regulator/rectifier can lead to various electrical issues, including a lack of power.
Understanding Regulator/Rectifier Functions
The regulator/rectifier maintains a stable voltage output to the battery. If it fails, it can either overcharge the battery or provide insufficient voltage, leading to electrical problems.
Understanding its function is key in diagnosing electrical issues.
Testing Voltage Output
Use a multimeter to test the voltage output from the regulator/rectifier. A healthy unit should provide a voltage range between 13.5 to 14.5 volts when the engine is running.
If the voltage is outside this range, the unit may need replacement.
Recognizing Symptoms of Failure
- Overcharging the battery, leading to swelling or leaking.
- Undercharging, resulting in a battery that will not hold a charge.
- Intermittent electrical issues, such as flickering lights.
| Voltage Output Status | Condition |
|---|---|
| 13.5 – 14.5 V | Regulator/rectifier is functioning properly |
| Above 14.5 V | Possible overcharging, regulator may need replacement |
| Below 13.5 V | Undercharging, regulator may need replacement |
The above table summarizes the expected voltage outputs from a motorcycle’s regulator/rectifier and the corresponding conditions. Regular testing can prevent battery damage and ensure the electrical system operates correctly.
Potential Wiring Issues and Short Circuits
If all previous components check out and the motorcycle still has no power, it may be time to investigate potential wiring issues. Shorts or frayed wires can cause significant electrical problems.
Identifying Frayed Wires
Inspect the wiring harness for any signs of fraying or damage. Pay special attention to areas where the wiring may rub against the frame or other components, which can lead to shorts.
Use electrical tape to secure any vulnerable areas.
Checking Ground Connections
A poor ground connection can lead to electrical issues. Ensure that all ground connections are clean and secure.
Use a multimeter to test continuity between the ground and the battery negative terminal.
Testing for Shorts
Use a multimeter to test for shorts in the wiring. Check each wire for continuity to ensure that there are no unintended connections that could cause a short circuit.
| Wiring Issue | Symptoms |
|---|---|
| Frayed Wires | Intermittent power loss, blown fuses |
| Poor Ground Connection | Flickering lights, no start |
| Short Circuit | Blown fuses, no power to components |
This table outlines common wiring issues and their associated symptoms. Identifying and fixing these issues is essential for restoring power to the motorcycle.
When to Seek Professional Help
While many electrical issues can be diagnosed and repaired by the owner, some problems may require professional assistance. Knowing when to seek help can save time and prevent further damage.
Recognizing Complex Problems
If basic troubleshooting does not resolve the issue, or if you suspect a more complex problem such as internal engine failure or intricate electrical faults, it is advisable to consult a professional mechanic. They have the experience and tools necessary to diagnose and repair complex problems effectively.
Finding a Qualified Mechanic
Look for mechanics who specialize in motorcycle repairs, particularly those with good reviews and recommendations from fellow riders. A qualified mechanic can provide insights and services that may not be possible for a layperson to achieve.
Understanding Repair Costs
Repair costs can vary significantly depending on the complexity of the issue and the parts involved. Basic electrical repairs can range from $50 to $150, while more extensive issues may cost several hundred dollars.
It’s best to get a quote before proceeding with any repairs.
| Repair Type | Average Cost |
|---|---|
| Battery Replacement | $50 – $150 |
| Fuse Replacement | $20 – $50 |
| Regulator/Rectifier Replacement | $100 – $300 |
The table above provides an overview of average repair costs for common electrical issues faced by motorcycle owners. Understanding these costs can help in budgeting for maintenance and repair.
FAQS on Motorcycle Has No Power But Battery Is Good
What should I check first if my motorcycle has no power?
The first step is to check the battery connections to ensure they are secure and free from corrosion. Then, test the battery voltage with a multimeter to confirm its condition.
If the battery is good, move on to inspecting fuses and the ignition switch.
How can I tell if my battery is faulty even if it shows 12 volts?
A fully charged motorcycle battery should read between 12.6 to 12.8 volts. If it reads 12 volts or below, it may not be holding a sufficient charge.
Testing under load or charging it and retesting can help determine if the battery is faulty.
What are the signs of a blown fuse in my motorcycle?
Common signs of a blown fuse include no power to lights or the starter, dimming lights, or a complete loss of electrical function. Always check the fuse visually or test with a multimeter for continuity if you suspect a blown fuse.
How do I test the ignition switch on my motorcycle?
Use a multimeter to test for continuity at the ignition switch. Ensure the switch is in the “on” position.
If the switch fails to show continuity when it should, it may need replacement.
Can a faulty regulator/rectifier cause no power to my bike?
Yes, a faulty regulator/rectifier can prevent proper voltage regulation, leading to battery overcharging or undercharging. This can result in a complete loss of power if the battery fails due to damage from overcharging.
Conclusion
In conclusion, troubleshooting a motorcycle that has no power despite a good battery can initially seem daunting. By following the outlined steps and systematically checking each component of the electrical system, riders can often identify and resolve the issue on their own.
However, if the problem persists, seeking professional assistance is recommended to avoid further damage and ensure the motorcycle is safe to operate. Regular maintenance and checks can prevent similar issues in the future, keeping your motorcycle in top condition for the open road.